How to make a delicious GF Cauliflower Pizza

Nutrition Facts

Servings 4


Amount Per Serving
Calories 149kcal

Craving Pizza but Want to Keep It Healthy? Try This Low-Carb Cauliflower Pizza Crust!

If you’re looking for a way to enjoy pizza without the guilt, you’re in the right place. This low-carb cauliflower pizza crust is the perfect healthy alternative, and the best part?

It only takes 6 simple ingredients and a few easy steps to make! Cauliflower has taken the food world by storm, becoming the go-to ingredient for everything from cauliflower rice to cauliflower tortillas—and of course, the beloved cauliflower pizza crust. It’s time to turn your favorite veggie into the ultimate pizza base!

Cauliflower Pizza Crust: The Game-Changer

Cauliflower pizza crust has become a favorite for those who want to enjoy pizza without all the carbs. While it doesn’t have the exact texture or taste of a traditional crust, eventually it delivers in flavor and crunch. The edges crisp up perfectly, giving you that satisfying bite, and the slight roasted cauliflower flavor pairs beautifully with classic pizza toppings. It’s truly the most fun way to eat cauliflower! For more Cauliflower delicious recipes try my Cauliflower Au Gratin.

Ingredients You’ll Need for the Cauliflower Pizza Crust

You only need a few basic ingredients to whip up this delicious, gluten-free pizza crust:

  • 1 medium cauliflower head, or 2 cups riced (you can also use store-bought cauliflower rice)
  • 1 garlic clove, minced
  • 1 cup shredded mozzarella cheese (part-skim)
  • ¼ cup Parmesan cheese (grated)
  • 1 large egg
  • 1 teaspoon dried basil
  • 1 teaspoon dried oregano
  • 1 teaspoon Italian seasoning (or a mix of oregano, basil, and thyme)

For toppings:

How to Make Cauliflower Pizza Crust: Step-by-Step

  1. Rice the Cauliflower: Start by chopping your cauliflower into florets and pulsing them in a food processor until you achieve a rice-like consistency. Don’t have a food processor? No worries—you can use a blender or even grate the cauliflower manually. Alternatively, you can grab pre-riced cauliflower from the store, just make sure it’s fresh (not frozen) to avoid excess moisture.
  2. Sauté the Cauliflower Rice: Transfer the riced cauliflower to a nonstick skillet over medium heat. Sauté for about 6-8 minutes until the cauliflower becomes translucent. This step is crucial to drying out the cauliflower, which will help give the crust that crispy, sturdy texture.
  3. Mix the Crust Ingredients: In a large mixing bowl, combine the cooked cauliflower rice, minced garlic, mozzarella, egg, basil, and oregano. Don’t worry if the cheese starts to melt slightly during this process—that’s totally fine!
  4. Shape the Crust: Line a baking sheet or pizza stone with parchment paper, lightly grease it with olive oil, and press the cauliflower mixture into a round pizza shape about ¼ inch thick.
  5. Bake the Crust: Bake your cauliflower crust at 400°F (200°C) for 25-30 minutes, or until it’s golden and crisp around the edges.
  6. Add Toppings: After the crust is done, remove it from the oven and set the oven to broil. Add your favorite toppings, like pizza sauce, more mozzarella, fresh basil, or any other toppings you love (just don’t overload it—this crust is a little more delicate than traditional dough).
  7. Broil the Pizza: Broil the pizza for about 5 minutes, until the cheese is melted and bubbly. Let it cool for a few minutes before slicing and serving.

Notes & Substitutions for the Best Cauliflower Pizza Crust

  • Cauliflower Rice Tips: When making cauliflower rice, be sure to remove as much moisture as possible. A soggy cauliflower base will lead to a soft crust, so it’s essential to dry it out during the sautéing process.
  • Dairy-Free Option: You can easily swap out the mozzarella with a dairy-free cheese, or if you prefer, try skipping the cheese altogether! Some have had success making this without cheese, but the texture will be slightly different.
  • Vegan Alternative: Want to make this crust vegan? You can substitute the egg with a vegan egg replacer or a flax egg. While I haven’t tested it, it should work just fine!
  • Toppings: The sky’s the limit when it comes to toppings. Just keep it simple to avoid weighing down the crust, which can make it less firm.

Can Pizza Be Healthy?

Absolutely! When you swap out traditional pizza crust for this low-carb, cauliflower-based alternative, you’re making a smart, nutritious choice. A single slice of cauliflower pizza crust has only 75 calories, 5 grams of carbs, and 5 grams of protein—all without sacrificing flavor! So yes, you can enjoy a couple of slices multiple times a week without any guilt.

Final Thoughts

Whether you are gluten-free, low-carb, or just looking for a healthier pizza option, this cauliflower pizza crust is a must-try. It’s a fun and tasty way to sneak more vegetables into your diet, all while satisfying your pizza cravings. So go ahead—grab that cauliflower and get cooking! Your taste buds (and your waistline) will thank you.

Delicious and Easy Gluten-Free Cauliflower Pizza

Difficulty:BeginnerPrep time: 15 minutesCook time: 35 minutesRest time: minutesTotal time: 50 minutesServings:4 servingsCalories:149 kcal Best Season:Available

Description

Are you looking for a healthy, gluten-free pizza alternative that doesn’t sacrifice flavor? Look no further! This gluten-free cauliflower pizza is packed with flavor, loaded with cheesy goodness, and has a perfectly crisp crust.

Ingredients

Instructions

  1. Rice the Cauliflower: Start by chopping your cauliflower into florets and pulsing them in a food processor until you achieve a rice-like consistency. Don’t have a food processor? No worries—you can use a blender or even grate the cauliflower manually. Alternatively, you can grab pre-riced cauliflower from the store, just make sure it’s fresh (not frozen) to avoid excess moisture.
  2. Sauté the Cauliflower Rice: Transfer the riced cauliflower to a nonstick skillet over medium heat. Sauté for about 6-8 minutes until the cauliflower becomes translucent. This step is crucial to drying out the cauliflower, which will help give the crust that crispy, sturdy texture.
  3. Mix the Crust Ingredients: In a large mixing bowl, combine the cooked cauliflower rice, minced garlic, mozzarella, egg, basil, and oregano. Don’t worry if the cheese starts to melt slightly during this process—that’s totally fine!
  4. Shape the Crust: Line a baking sheet or pizza stone with parchment paper, lightly grease it with olive oil, and press the cauliflower mixture into a round pizza shape about ¼ inch thick.
  5. Bake the Crust: Bake your cauliflower crust at 400°F (200°C) for 25-30 minutes, or until it’s golden and crisp around the edges.
  6. Add Toppings: After the crust is done, remove it from the oven and set the oven to broil. Add your favorite toppings, like pizza sauce, more mozzarella, fresh basil, or any other toppings you love (just don’t overload it—this crust is a little more delicate than traditional dough).
  7. Broil the Pizza: Broil the pizza for about 5 minutes, until the cheese is melted and bubbly. Let it cool for a few minutes before slicing and serving.
Keywords:Easy cauliflower pizza, Healthy low-carb pizza, Cauliflower pizza crust recipe, Gluten-free cauliflower pizza, Keto cauliflower pizza

Nutrition Facts

Serving Size1plate
Servings4
Amount Per Serving
Calories149
% Daily Value *
Total Carbohydrate9g
3%
Dietary Fiber5g
20%
Sugar2g
Total Fat6g
10%
Saturated Fat3g
15%
Trans Fat1g
Cholesterol62mg
21%
Sodium267mg
12%

How to make the best vegan GF Lentil Bread Roll

The Ultimate Healthy Lentil Bread

Are you on a quest for the perfect gluten-free bread? Look no further! Our gluten-free lentil bread rolls are not only easy to make but also packed with nutrients and flavor. Whether you’re a gluten-free enthusiast, a passionate home cook, or simply someone looking to eat healthier, this recipe is sure to become a favorite.

Why Choose Gluten-Free Lentil Bread?

Gluten-free bread has gained popularity among health-conscious individuals, and for good reason. Traditional bread can be heavy and laden with gluten, which some people find hard to digest. Our lentil bread rolls are:

  • Nutritious: Lentils are high in protein, fiber, and essential vitamins and minerals.
  • Gluten-Free: Perfect for those with gluten intolerance or celiac disease.
  • Easy to Make: With simple ingredients and straightforward steps, you can enjoy homemade bread in no time.

Ingredients You’ll Need

Understanding the role of each ingredient allows you to appreciate how they work together to create delicious and nutritious lentil bread rolls:

  • Psyllium Husk: This ingredient is crucial for gluten-free baking as it acts as a binding agent. It helps to mimic the elasticity and chewiness that gluten would typically provide, giving the bread structure and preventing it from becoming crumbly.
  • Cumin seeds: While optional, cumin seeds play a significant role in flavor enhancement. They add an earthy, warm taste that complements the earthiness of the lentils, creating a more complex and satisfying flavor experience in each bite.
  • Baking Powder and Baking SodaBoth of these leavening agents are important for creating the right texture in your bread. Baking soda needs an acid to activate, while baking powder contains its own acid. Together, they help the bread rise, resulting in a lighter and airier final product.
  • Dry YeastYeast is vital for fermentation, which not only imparts flavor but also contributes to the bread’s overall rise. While this recipe uses a combination of baking powder and baking soda for quicker results, the yeast adds depth to the flavor profile.
  • Olive OilThis ingredient not only enriches the dough but also enhances moisture and softness in the finished bread. Olive oil adds healthy fats, improving the overall nutritional value and contributing to a delightful texture.

Step-by-Step Recipe for Gluten-Free Lentil Bread Rolls

Follow these easy steps to create the ultimate gluten-free lentil bread:

1. Prep the Lentils

  • Soak the lentils overnight or for at least 8 hours. Use two cups of water, making sure the water level is about 1/3 above the lentils.
  • Wash the lentils thoroughly until the water runs clear.

2. Blend the Ingredients

  • Using an emulsifier blender or food processor, pulse the lentils until about 80% are processed.
  • Add the olive oil and continue to blend.
  • Incorporate all the other ingredients and blend until smooth.

3. Prepare for Baking

  • Set aside the mixture for 5 minutes.
  • Preheat your oven to 350°F (175°C).
  • Line a baking sheet with parchment paper.

4. Form the Dough

  • Add some olive oil to a spoon and your hands to prevent the dough from sticking.
  • Form the dough into balls of your desired size and place them on the baking sheet.
  • Sprinkle your preferred toppings (pumpkin seeds, sunflower seeds, or cumin seeds) on top of each roll.

5. Bake

  • Bake in the preheated oven for 45-50 minutes, keeping an eye on them as baking times can vary depending on your oven.

Enjoy Your Homemade Lentil Bread Rolls!

Once baked, allow the bread rolls to cool slightly before serving. These gluten-free lentil bread rolls are perfect on their own or as a base for sandwiches. Also, try my gluten-free Oatmeal bread.

Health Benefits of Lentils

Lentils are a powerhouse of nutrition. They are:

  • High in Protein: Great for vegetarians and vegans.
  • Rich in Fiber: Promotes digestive health.
  • Packed with Vitamins and Minerals: Including iron, folate, and magnesium.

Pro Tips for Baking Lentil Bread

  • Choose the Right Lentils: While green lentils work well, experimenting with red or brown lentils can offer different textures and flavors. Just ensure they are cooked and blended properly.
  • Adjust Consistency: If your dough seems too thick, add a little warmer water to reach your desired consistency. Conversely, if it’s too thin, incorporate a bit more psyllium husk to help bind the mix.
  • Store Properly: After baking, store leftover bread rolls in an airtight container at room temperature for up to three days. For longer storage, freeze them and reheat as needed.
  • Ensure Proper Blending: Blending the lentils well ensures a smoother dough.
  • Monitor Baking Time: Since oven temperatures can vary, start checking your rolls at the 40-minute mark.
  • Experiment with Flavors: Feel free to add herbs or spices to the dough for added flavor.

Frequently Asked Questions about Lentil Bread

  1. Can I use canned lentils instead of dry?

           Yes, you can use canned lentils for convenience. Just be sure to rinse and drain them thoroughly before blending to avoid excess moisture.

  1. How can I enhance the flavor of the bread?

         You can add herbs, garlic powder, or even cheese to the dough before baking. Experiment with different spices to create unique flavor profiles!

  1. Is lentil bread suitable for a ketogenic diet?

          While lentils are nutritious, they are also higher in carbohydrates than some other gluten-free alternatives. If you’re following a strict                                 ketogenic diet, check your portion sizes.

  1. What can I use as a substitute for psyllium husk?

          Chia seeds, flaxseed meal, or a combination of both can work as substitutes. However, note that they may alter the texture slightly.

  1. Can I make this recipe vegan?

          Absolutely! This lentil bread recipe is naturally vegan, as it does not include any animal products. Enjoy the health benefits without worry!

Conclusion

Gluten-free baking doesn’t have to be complicated or boring. With our ultimate healthy lentil bread rolls, you get a delicious, nutritious, and easy-to-make alternative to traditional bread. Ready to give it a try? Start baking and join our community of gluten-free enthusiasts today!

Looking for healthier, gluten-free recipes? Subscribe to our newsletter for regular updates and exclusive recipes.

Feel free to add any personal touches, comments, or questions in the comments section below. Happy baking!

How to make the best vegan GF Lentil Bread Roll

Difficulty:BeginnerPrep time: 10 minutesCook time: 40 minutesRest time: 10 minutesTotal time:1 hour Servings:4 servingsCalories:350 kcal Best Season:Available

Description

Delight in the wholesome goodness of homemade gluten-free lentil bread rolls! Packed with protein, fiber, and essential nutrients, these versatile rolls are perfect for sandwiches or enjoyed on their own. Making every bite a healthy treat!

Ingredients

Instructions

  1. Soak the lentils overnight or for at least 8 hours. Use two cups of water, making sure the water level is about 1/3 above the lentils.
  2. Wash the lentils thoroughly until the water runs clear.
  3. Using an emulsifier blender or food processor, pulse the lentils until about 80% are processed.
  4. Add the olive oil and continue to blend.
  5. Incorporate all the other ingredients and blend until smooth.
  6. Set aside the mixture for 5 minutes.
  7. Preheat your oven to 350°F (175°C). Line a baking sheet with parchment paper.
  8. Add some olive oil to a spoon and your hands to prevent the dough from sticking.
  9. Form the dough into balls of your desired size and place them on the baking sheet.
  10. Sprinkle your preferred toppings (pumpkin seeds, sunflower seeds, or cumin seeds) on top of each roll.
  11. Bake in the preheated oven for 45-50 minutes, keeping an eye on them as baking times can vary depending on your oven.
Keywords:Healthy breads, Lentil breads, Vegan buns, Vegetarian buns, gluten free buns, gluten free dinner roll, Vegan dinner roll, Legumes bread

Nutrition Facts

Serving Size1plate
Servings4
Amount Per Serving
Calories350
% Daily Value *
Total Fat16.5g
26%
Saturated Fat2g
10%
Cholesterol0g
Sodium400mg
17%
Total Carbohydrate43g
15%
Dietary Fiber53g
212%
Sugar1.9g
Protein21g
42%
Potassium3750mg
108%

How to make an irresistibly delicious Split Pea

A Hearty Hug in a Bowl- Welcome back Palette Pioneers!

Imagine coming home from a long day, your stomach growling, and the aroma of a warm, hearty soup greeting you at the door. This isn’t just any soup; it’s a flavorful, nutritious, and comforting split pea soup inspired by my mom’s winter cooking. Perfect for foodies, health enthusiasts, and home cooks alike, this easy split pea soup recipe will not only warm your soul but also fit seamlessly into your gluten-free lifestyle. Whether you’re looking for a satisfying lunch paired with some gluten-free crackers or a standalone dinner, this soup has you covered.

In this blog post, I’ll walk you through how to make an irresistibly delicious and easy split pea soup. We’ll cover everything from ingredient selection to cooking tips, ensuring that you end up with a bowl of soup that’s as nourishing as it is tasty.

The Allure of Split Pea Soup

Why Split Peas?

Split peas are often overlooked in the culinary world, yet they pack a punch in both flavor and nutrition. Loaded with fiber, protein, and essential vitamins, these little gems are a fantastic base for a hearty soup. They have a mild, slightly sweet flavor that pairs well with various spices and ingredients, making them a versatile choice for a range of recipes.

Health Benefits

Split pea soup is not only delicious but also incredibly nutritious. It’s high in dietary fiber, which is excellent for digestive health. It’s also a great source of plant-based protein, making it perfect for vegetarians and vegans. Additionally, split peas contain a variety of vitamins and minerals, including iron, magnesium, and folate, contributing to overall wellness.

Comfort Food

There’s something inherently comforting about a bowl of warm soup, especially when it’s made with love and care. For me, split pea soup is a nostalgic dish that brings back memories of winter afternoons spent in my mother’s cozy kitchen. It’s the ultimate comfort food, ideal for those chilly days when you need something to warm you from the inside out.

Ingredients You’ll Need

Simple and Accessible

One of the best things about this split pea soup recipe is its simplicity. You don’t need a long list of exotic ingredients to create something extraordinary. Here’s what you’ll need:

Quality Matters

While the ingredient list is short, the quality of each component significantly impacts the final product. Opt for organic split peas if possible, and use fresh garlic for the best flavor. High-quality olive oil will add a rich, smooth texture to your soup, while fresh or high-quality dried spices will enhance the overall taste.

Nutritional Powerhouse

This simple combination of ingredients results in a soup that’s rich in nutrients. Split peas are high in protein and fiber, garlic offers a host of health benefits, including boosting the immune system, and olive oil provides healthy fats that are good for heart health. This soup is not only satisfying but also incredibly good for you.

Cooking Time and Serving Size

Quick and Easy

This recipe is designed to be straightforward and uncomplicated, perfect for busy individuals who still want to enjoy a home-cooked meal. The total cooking time is approximately 45 minutes, with minimal prep work required.

Serves Four

The quantities listed will yield enough soup to serve four people. It’s ideal for a small family dinner or for meal-prepping lunches for the week. You can easily adjust the quantities if you’re cooking for more or fewer people.

Nutritional Information

Based on the listed ingredients, this split pea soup is low in calories but high in nutrients. Each serving is packed with protein, fiber, vitamins, and minerals, making it a well-rounded meal option.

Step-by-Step Cooking Instructions

Step 1: Prepare Your Ingredients

Start by rinsing the dried split peas under cold water until the water runs clear. Peel the garlic cloves and set them aside.

Step 2: Add the Split Peas

In a large instant pot, add the rinsed split peas first. all spices,  and gently crush and rub Thyme inside your fist  until it becomes fragrant.


Step 3: Add the Spices

Add salt, cumin, cayenne pepper,  and gently crush and rub Thyme inside your fist until it becomes fragrant.

Step 4: Add Water

Pour in enough water to cover the split peas by about an inch. This usually requires around 3-4 cups of water.

Step 5: Simmer and stir

Bring the mixture to a boil, then reduce the heat to low and simmer.

Step 6: Add Garlic

Add garlic last then cover the pot and set it on high 10 minutes.

Step 7: Simmer and Stir

Allow the soup to simmer for about 10-15 minutes. The split peas should become tender and begin to break down, creating a thick, hearty consistency.

Step 8: Blend

Using either a food processor or an immersion blender, pour the soup and blend until creamy.

Step 9: Return to the pot

Return the blended soup to the pot, taste the soup and adjust the seasoning if necessary. You might want to add a pinch of salt or a dash more cayenne pepper, depending on your preference. Once the soup reaches your desired consistency and flavor, it’s ready to serve.

Tasting Notes and Pairings

Flavor Profile

This split pea soup offers a delightful blend of flavors. The earthiness of the split peas is complemented by the warmth of the cumin and the subtle heat from the cayenne pepper. The garlic adds depth, while the olive oil gives the soup a smooth, rich texture.

Perfect Pairings

For a complete meal, pair this soup with gluten-free crackers or a warm slice of gluten-free naan. The mild flavors of the bread or crackers will complement the robust taste of the soup without overwhelming it.

Serving Suggestions

Garnish your soup with a sprinkle of fresh herbs, such as parsley or cilantro, for an added burst of flavor and color. A drizzle of olive oil or a dollop of dairy-free yogurt can also elevate the dish.

The Perfect Year-Round Dish

Winter Warmth

While this soup is a staple in my household during the colder months, it’s versatile enough to be enjoyed year-round. Its hearty nature makes it a perfect winter warmer, providing the comfort and sustenance needed on chilly days.

Spring and Summer

In the warmer months, serve the soup slightly cooler with a fresh side salad. The lighter, vibrant flavors of the salad can balance the rich, creamy texture of the soup, making it a refreshing yet satisfying meal.

Autumn Evenings

As the leaves begin to change and the evenings grow cooler, this soup can transition effortlessly into your autumn meal rotation. Pair it with roasted vegetables or a simple grain dish for a well-rounded, seasonal dinner.

Personal Anecdote

A Taste of Home

Lunch at home was a daily highlight for me growing up. My mom’s cooking always felt like a hug in a bowl, and her split pea soup held a special place in my heart. The first time I tried it was during my freshman year of college when I was feeling under the weather. One bowl of this warm, nourishing soup was all it took to lift my spirits and comfort me.

College Comfort

Away from home and adjusting to a new life, this soup became my go-to remedy for homesickness and colds alike. The familiar flavors and simple preparation made it a staple in my tiny dorm kitchen, keeping me connected to home and well-nourished through late-night study sessions.

Sharing the Love

Now, I’m excited to share this cherished recipe with you. It’s more than just a meal; it’s a piece of my family’s culinary tradition that I hope will bring comfort and joy to your kitchen as well.

Conclusion

Creating an irresistibly delicious split pea soup is easier than you might think. With simple ingredients and straightforward steps, you can enjoy a hearty, nutritious meal that’s perfect for any season. Whether you’re a seasoned home cook or new to the kitchen, this recipe is sure to become a favorite.

Don’t just take my word for it—try it yourself and experience the magic of homemade split pea soup. If you’re looking to explore more gluten-free soup ideas or want personalized cooking tips, consider booking a session with one of our expert chefs. Happy cooking!


How to make an irresistibly delicious Split Pea

Difficulty:BeginnerPrep time: 10 minutesCook time: 20 minutesRest time: 5 minutesTotal time: 35 minutesServings:4 servingsCalories:300 kcal Best Season:Available

Description

Looking for a quick and easy dinner idea? Our irresistibly delicious split pea soup is perfect for busy nights! Ready in no time, this hearty and flavorful dish will have everyone asking for seconds. Try it now!

Ingredients

Instructions

  1. Start by rinsing the dried split peas under cold water until the water runs clear. Peel the garlic cloves and set them aside.
  2. In a large instant pot, add the rinsed split peas first. all spices,  and gently crush and rub Thyme inside your fist  until it becomes fragrant.
  3. Add salt, cumin, cayenne pepper,  and gently crush and rub Thyme inside your fist until it becomes fragrant.
  4. Pour in enough water to cover the split peas by about an inch. This usually requires around 3-4 cups of water.
  5. Bring the mixture to a boil, then reduce the heat to low and simmer.
  6. Add garlic last then cover the pot and set it on high 10 minutes.
  7. Allow the soup to simmer for about 10-15 minutes. The split peas should become tender and begin to break down, creating a thick, hearty consistency.
  8. Using either a food processor or an immersion blender, pour the soup and blend until creamy.

  9. Return the blended soup to the pot, taste the soup and adjust the seasoning if necessary. You might want to add a pinch of salt or a dash more cayenne pepper, depending on your preference. Once the soup reaches your desired consistency and flavor, it’s ready to serve.
Keywords:Vegan soup recipes, Split pea soup recipes ideas, hearty soups, easy soups recipes, delicious soups recipes, quick soups recipes, Instant pot soups recipes

Nutrition Facts

Serving Size1bowl
Servings4
 
Amount Per Serving
 
Calories521
 
% Daily Value *
 
Total Fat37g
57%
 
Saturated Fat5g
25%
 
Trans Fat0g


Cholesterol0mg
0%
 
Total Carbohydrate42.6g
15%
 
Dietary Fiber18g
72%
 
Sugar4.7g


Protein15g
30%
 
Potassium943mg
27%
 

How to make a simple yet delicious Zucchini Soup

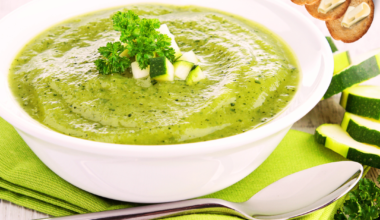
Hey Palate Pioneers! Welcome back to my kitchen. Today, I’m going to share a recipe that’s very close to my heart—Zucchini Soup, inspired by my mom’s fresh zucchini soup from her farm. It’s perfect for vegetarian enthusiasts, healthy eaters, and home cooks alike.

So why zucchini? Well, zucchinis are a powerhouse of nutrients, packed with antioxidants, and they offer numerous health benefits. They’re great for digestion, heart health, and even help reduce blood sugar levels. Plus, this delicious zucchini soup is super easy to make!


This refreshing zucchini soup recipe is perfect for those hot summer days when you want something light yet satisfying. Whether you’re entertaining guests or just cooking for your family, this recipe is easy to follow and customize to your liking.

Let’s get started! First, gather your ingredients. You’ll need diced zucchinis, garlic, onions, vegetable broth or water, and fresh herbs like  basil. Start by heating a pot with a tablespoon of butter and two tablespoons of ghee butter for a richer flavor.  Sauté a large diced onion and minced garlic clove for about 5 minutes or until golden brown.

Next, add your diced zucchinis, a pinch of salt, and black pepper, and a half teaspoon of Turmeric for a vivid color. Sauté for another 5 minutes. Add a tablespoon of gluten free flour and stir well until combined. Add a tablespoon of water or vegetable broth and continue stirring. Pour in your vegetable broth, bring the mixture to a boil, then lower the heat and let it simmer for about 20 minutes or until the zucchinis are tender.

Ingredients to make Zucchini Soup

For a rich flavor, I use a mix of ghee and olive oil. If you don’t have ghee, you can use just olive oil or substitute the ghee with regular butter. Making your own ghee at home is a fun project and adds a hint of nuttiness to the soup.

Once the zucchinis are cooked, add few leaves of basil and some cream cheese (optional), turn off the heat and let the mixture cool down a bit. Then, puree the soup in a blender or with an immersion blender until it reaches a smooth consistency.

Return the soup to the pot and pour in quarter  a cup of coconut cream (optional) to give your zucchini soup a creamy texture. You can also add freshly chopped herbs like thyme, basil, spinach, or parsley to add a burst of flavors.

And now, the final touch. Serve the soup in individual bowls and garnish it with your favorite toppings like freshly ground pepper, croutons, or additional herbs. You can also drizzle a tablespoon of olive oil on top to add a touch of richness.

There you have it—a delicious and healthy way to enjoy the best of zucchini season. I hope you try this recipe at home and love it as much as I do. Thanks for visiting, and happy cooking! Don’t forget to leave a comment and subscribe or more delicious recipes. See you next time!

How to make Zucchini Soup

Step 1- In a large pot over medium heat  add butter and olive oil.

Step 2- Add diced onions and sauté for few minutes or until translucent.

Step 3- Add garlic and sauté for few minutes.

Step 4- Add cut Zucchini, then sauté for another 6 minutes.

Step 5- Add flour and stir well, then add a tablespoon of water until all incorporated.

Step 6- Add basil leaves, then stir well.

Step 7- Add more water and continue stirring.

Step 8- Add the rest of water, cover and cook for 20 minutes or until soft.

Step 9- Add few basil leaves and cream cheese is optional.

Step 10- Set it aside for few minutes to cool down, blend until creamy.

How Do You Thicken Zucchini Soup

This zucchini soup recipe doesn’t require a roux or slurry in order to thicken it. Instead,potatoes are added to the soup and are blended into the broth until smooth and creamy. This makes the broth nice and thick without the need to add anything extra.

What to serve with zucchini soup?

Zucchini soup can be served on its own but I’d suggest dipping some crusty bread, such as a toasted sourdough or your favorite crackers in it. You could also top this soup with homemade croutons made from leftover sandwich bread or even cornbread, which I always make too much of around the holidays.

Storage

Store in an airtight container and refrigerate for up to 3 days or in the freeze for up to 3 months.

How to make a simple yet delicious Zucchini Soup

Difficulty:BeginnerPrep time: 20 minutesCook time: 20 minutesRest time: 5 minutesTotal time: 45 minutesServings:6 servingsCalories:350 kcal Best Season:Available

Description

Savor the simplicity of a delicious zucchini soup with our easy-to-follow recipe. Packed with fresh flavors and nutritious ingredients, this creamy soup is perfect for a cozy meal any day of the week.

Ingredients

Instructions

  1. In a pot over medium heat add the ghee and olive oil.
  2. Add the onions and sauté until translucent..
  3. Add the garlic and sauté for 5 minutes. 
  4. Add GF flour, stir well until incorporated and sauté for another 5 minutes.
  5. Add basil leaves and some water or broth stir well until incorporated
  6. Add the vegetables broth or water and stir well, then cover and allow it to cook for 20 minutes.
  7. Add few more basil leaves and cream cheese (optional)
  8. Set aside to cool down and then use an immersion blender to purée the soup to your desired consistency.
  9. Once the soup has been plated, sprinkle it with cilantro, parsley and coconut milk per your preference
Keywords:Zucchini soup, zucchini recipe ideas, Delicious Zucchini Soup, Delicious Zucchini recipes, Leeks delicious soup

Nutrition Facts

Servings 4


Amount Per Serving
Calories 300kcal

Nutrition Facts

Serving Size1bowl
Servings6
 
Amount Per Serving
 
Calories585
 
% Daily Value *
 
Total Fat45g
70%
 
Saturated Fat13g
65%
 
Trans Fat0.80g


Total Carbohydrate42g
15%
 
Dietary Fiber6g
24%
 
Sugar5g


Protein9g
18%
 
Potassium967mg
28%
 

How to make a delicious Black Bean Soup

A Hearty Vegetarian Delight

This delicious soup is easy to make and ready in just 45 minutes. It is perfect for busy evenings, chilly days, or hot summer days. Let’s dive into the recipe and discover how you can make this savory dish your own!

Discover the ultimate vegetarian black bean soup recipe! This hearty, flavorful soup is easy to make and perfect for weeknight dinners. Customize it with your favorite toppings and enjoy a wholesome meal in no time. For more hearty soups, try my broccoli soup, zucchini soup, or lentil soup.

Why You’ll Love This Black Bean Soup

This black bean soup, enriched with carrots, cumin, and a savory vegetable broth, is a versatile and filling meal that’s made in one pot. It’s vegetarian and vegan-friendly, perfect for accommodating dietary preferences. Plus, the toppings and variations are endless, allowing you to customize it each time you make it.

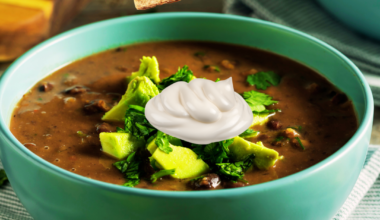
The topping and variation options are limitless! Use what you have on hand, like sliced avocado, a dollop of sour cream, or Pico de Gallo.

This soup can be customized  by adding your favorite things such as shredded chicken, diced green chilies, or even a splash of hot sauce. It’s perfect for dipping tortilla chips or sourdough bread into as well!

Key Features

  • Quick and Easy: Ready in about 45 minutes.
  • Healthy and Filling: Packed with protein and fiber.
  • Versatile: Customize with your favorite toppings and variations.

Ingredients You’ll Need

Let’s gather the ingredients and equipment:

Equipments 

In the world of culinary arts, the combination of onions, carrots, and celery is famously known as mirepoix.

These ingredients, When chopped into similarly sized pieces, these ingredients, the foundation of many dishes. Moreover, cooking them in olive oil until they become tender unlocks their full potential.

Thus, incorporating mirepoix into your cooking can elevate the overall taste profile, making it a staple in many recipes. For a Cuban twist on black bean soup, include diced bell peppers and a bay leaf.

  • Spices: All you need are cumin, oregano, salt, and pepper! These spices will meld with the softened vegetables, releasing their full flavors. For an extra kick, add a few shakes of chili powder or cayenne pepper to taste.
  • Black Beans: Canned black beans are ideal for this hearty soup—they’re convenient, budget-friendly, and delicious. They are best when drained and rinsed before adding them to the recipe.
  • Vegetable Broth: Choose your favorite vegetable broth to add rich savoriness to this dish. Opt for a lower-sodium broth if you want more control over the soup’s flavor. If you prefer, you can substitute with chicken broth or stock.
  • Lime Juice: Fresh lime juice brightens the soup and adds a delightful citrus note. For the best taste, squeeze fresh limes.

Step-by-Step Instructions

  1. Prepare the Vegetables: Heat the olive oil in a medium Dutch oven over medium heat. Add the chopped onion, carrot, and celery. Cook while stirring occasionally until the vegetables are tender about 10 minutes.
  2. Add the Spices: Stir in the minced garlic, ground cumin, dried oregano, kosher salt, and a few grinds of black pepper. Cook, stirring constantly, for 2 minutes to let the spices bloom and release their flavors.
  3. Add Beans and Broth: Pour in the drained and rinsed black beans, vegetable broth, and fresh lime juice. Bring the mixture to a boil over medium-high heat. Then, reduce the heat to low, cover, and simmer the soup for 25 minutes while stirring occasionally.
  4. Blend the Soup: For a thicker consistency, blend 2 cups of the soup using a regular blender or immersion blender. Stir the blended portion back into the pot.
  5. Thicken and Serve: cook the soup uncovered until it reaches the desired thickness 10 to 20 minutes. Serve topped with sliced avocado, a dollop of sour cream, and fresh chopped cilantro, or your preferred toppings.

  1. In a large pot, add the oil and warm over medium heat. Add the onion, carrot, and celery. Cook, stirring occasionally, until the vegetables are tender, about 10 minutes.
  2. Add the garlic, cumin, salt, red pepper, and a few grinds of black pepper. Cook, stirring constantly for 2 minutes.

3. Add the black beans to the Dutch oven.

4. Add the broth and lime juice. Bring the soup to a boil over medium-high heat, then reduce the heat to low. Cover, and simmer for 25 minutes, stirring occasionally.

5. For a thicker soup, blend 2 cups of the soup in a regular blender or with a stick or immersion blender.

6. Stir the blended soup back into the pot. Cook, uncovered, until the soup has thickened and reached the desired consistency, about 10 to 20 minutes more. Cook the full 20 minutes if you prefer a thicker soup. Serve topped with avocado, sour cream, and cilantro or as desired.

Pro Tips for Making This Recipe

  • Stir Constantly When Adding Spices: Cooking the spices with oil and vegetables helps them bloom and release valuable flavor. Make sure to stir constantly during this step to prevent the spices from burning or sticking to the bottom of the pot.
  • Rinsing Black Beans is Optional: Canned black beans come packed in a starchy liquid that can thicken soups and stews. If you prefer a thicker soup, don’t drain them! For a more brothy soup, use a wire mesh strainer to drain the beans quickly and rinse them with cool water.
  • Adjust Lime Juice to Taste: For a less tangy soup, reduce the lime juice to 2 tablespoons. If you love the flavor of limes, serve the soup with additional lime wedges.
  • Thicken the Soup by Blending: Pureeing some of the beans thickens the soup and creates a hearty, luscious texture. This step is optional. If using a countertop blender, handle the hot soup with caution: remove the centerpiece of the lid and cover the top with a towel to prevent splashing.
  • Thin the Soup with Additional Broth: If the soup becomes too thick after blending or when reheated, add some vegetable broth to achieve your desired consistency.
  • Chicken Black Bean Soup Variation: To add extra protein, stir in cooked shredded chicken before serving. Leftover roasted chicken or store-bought rotisserie chicken works well if you don’t need the recipe to be vegetarian.

Tricks for the Perfect Black Bean Soup

  • Bloom the Spices: Ensure you stir constantly when adding the spices to prevent burning and fully release their flavors.
  • Optional Rinsing: Rinsing the black beans is optional. If you prefer a thicker soup, don’t drain them. For a brothier soup, use a strainer to drain and rinse the beans.
  • Adjust Lime Juice: Tailor the lime juice to your taste. Reduce to 2 tablespoons for a less tangy soup, or serve with additional lime wedges for a brighter flavor.
  • Blending Safely: When using a countertop blender, handle the hot soup with caution. Remove the lid’s centerpiece and cover the top with a towel to prevent splashing.
  • Adjust Consistency: Thin the soup with additional vegetable broth if it becomes too thick after blending or reheating.
  • Variations: For a non-vegetarian version, add cooked shredded chicken before serving.

Frequently Asked Questions

How Do I Store Leftovers?

Store leftovers in an airtight container in the refrigerator for up to 5 days. Set it aside until the soup cools down to room temperature before storing it. For longer storage, freeze the soup in a freezer-safe container or freezer bag for up to a month. To defrost, place the frozen soup in the refrigerator overnight and reheat it in a soup pot on the stovetop at medium heat.

What Do I Serve with This?

Enhance your meal with simple toppings like cilantro or more indulgent options such as sour cream, freshly grated cheddar cheese, or sliced jalapeños. Pico de Gallo, salsa, or guacamole make delicious additions. For a complete meal, serve the soup with warm cornbread muffins or pair it with garlic bread or dinner rolls.

Can I Make This Spicy?

Yes, you can! For a spicy black bean soup, add diced jalapeño peppers to the onion mixture while sautéing. Include ¼ – ½ teaspoon of cayenne pepper along with the cumin. Adjust the heat level by serving with extra jalapeños or hot sauce.

Can You Make This with Dried Beans?

While canned beans make the process simpler, you can use dried beans if preferred. To save time, use my no-soak Instant Pot black beans recipe but omit the spices, as you’ll be adding them to the soup. Otherwise, cook the dried beans according to the package instructions before using.

Is soaking black beans necessary before making the soup?

If using canned beans, soaking is unnecessary. For dried black beans, refer to the package instructions to determine if soaking is required and for how long. Soaking reduces cooking time by allowing the beans to begin rehydrating.

Enjoy your hearty bowl of black bean soup and feel free to experiment with toppings and variations to make it your own every time!

How to make a delicious Black Bean Soup

Difficulty:BeginnerPrep time: 20 minutesCook time: 40 minutesRest time: 5 minutesTotal time:1 hour 5 minutesServings:6 servingsCalories:300 kcal Best Season:Summer

Description

This amazing and delicious black bean soup is a hearty, flavorful dish that’s perfect for any season. Packed with protein-rich black beans, aromatic spices, and fresh vegetables, this soup is not only nutritious but also incredibly satisfying. Ideal for busy weeknights, it’s easy to prepare and can be customized to suit your taste. Whether you prefer it spicy or mild, thick or brothy, this versatile soup will quickly become a favorite in your recipe collection. Serve it with your favorite toppings like sour cream, cheddar cheese, or sliced jalapeños, and pair it with warm cornbread or garlic bread for a complete meal. Enjoy the comforting flavors of this black bean soup anytime you crave a wholesome, homemade meal.

Ingredients

Instructions

  1. In a large pot, add the oil and warm over medium heat. Add the onion, carrot, and celery. Cook, stirring occasionally, until the vegetables are tender, about 10 minutes.
  2. Add the garlic, cumin, salt, red pepper, and a few grinds of black pepper. Cook, stirring constantly for 2 minutes.
  3. Add the black beans to the Dutch oven.
  4. Add the broth and lime juice. Bring the soup to a boil over medium-high heat, then reduce the heat to low. Cover, and simmer for 25 minutes, stirring occasionally.
  5. For a thicker soup, blend 2 cups of the soup in a regular blender or with a stick or immersion blender.
  6. Stir the blended soup back into the pot. Cook, uncovered, until the soup has thickened and reached the desired consistency, about 10 to 20 minutes more. Cook the full 20 minutes if you prefer a thicker soup. Serve topped with avocado, sour cream, and cilantro or as desired.

Notes

    u003cliu003eIf you try this recipe, please leave me a comment below. Enjoy this amazing and delicious recipe. Happy Cooking!u003c/liu003e
Keywords:Vegetarian Black Bean Soup, Delicious Black Bean Soup, Easy Black Bean Soup, Amazing Black Bean Soup, Nourishing Black Bean Soup, Nutritious Black Bean Soup

Nutrition Facts

Servings 4


Amount Per Serving
Calories 300kcal

Nutrition Facts

Serving Size1Bowl Servings6   Amount Per Serving   Calories100   % Daily Value *   Total Fat16g 25%   Saturated Fat3g 15%   Monounsaturated Fat10g Polyunsaturated Fat2g 4%   Protein21g 105%   Carbohydrate65g * % Daily Values are based on a 2,000 calories diet. Your daily value may be higher or lower depending on your calorie needs.

Easy and Delicious Recipes

Indulge in our featured recipes, selected by top chefs to tantalize your taste buds. Elevate your cooking with these standout dishes.


How to make amazing black bean soup


Gluten-Free Jalapeño Cornbread Muffins


Gluten-Free Jalapeño Cornbread Muffins


Refreshing Ginger Lemonade


Refreshing Ginger Lemonade


Indian whole grilled chicken

How to make an Amazing Gluten Free Pumpkin Muffin

“Irresistibly delicious, moist, tender and full of fall flavor in every bite that will surely please any crowd!”
 

Pumpkin Muffin Magic: A Fall Favorite

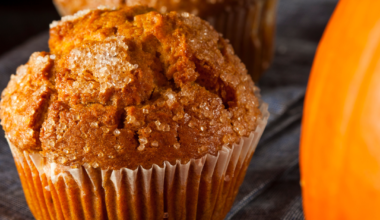
Indulge in the softness and fluffiness of pumpkin muffins this fall. Enriched with your favorite autumn spices and the irresistible essence of pumpkin, these treats are quick to prepare. They keep their tender texture for days, becoming a household staple.

A Kitchen Alive with Autumn Spirit

With the arrival of fall, my kitchen becomes a vibrant baking center, spotlighting subtly spiced pumpkin muffins. Their easy preparation and my husband’s frequent requests have made them a year-round delight.

Simple and Quick Baking

Creating these pumpkin muffins requires just 10 minutes of active effort. Starting with a hot oven ensures tall, beautifully domed muffins. They’re made with pantry staples, making this recipe a convenient choice for any baker.

Expanding Your Pumpkin Breakfast Menu

Interested in more pumpkin-flavored breakfasts? Try baked pumpkin donuts, scones, or pancakes. Each recipe brings the comforting flavors of fall into your mornings.

Overcoming Dietary Restrictions with Flavor

For those facing dietary restrictions, the challenge of missing out on seasonal flavors like pumpkin spice can be disheartening. Yet, making gluten-free pumpkin muffins offers a delicious solution that doesn’t skimp on flavor.

The Ultimate Gluten-Free Pumpkin Muffin Recipe

Discover the best gluten-free pumpkin muffin recipe here. It’s so moist and flavorful; you won’t believe it’s gluten-free. The key is pumpkin puree, creating a rich, moist texture. Get ready to enjoy the most delightful gluten-free pumpkin muffins baked right in your kitchen.


What you will need to make this recipe

Gluten Free flour- I used 1-1 cup Bob’s Red Mill gluten free flour Gluten Free Flour, if you don’t have any issue with regular flour feel free to use it in the same cup measurement.

I don’t suggest using almond flour or coconut flour as these flours have much density than gluten free flour and requires a different measurement.

Leavening agents- for a fluffy, and puffed muffins, you will need both baking powder and baking soda.

Spices- whether homemade or store-bought pumpkin pie spice, it packs a perfect fall flavor. The choice is yours, so if you only like cinnamon, use just that. Another suggestion is to use garam masala for a savorer and bolder flavor.

Pumpkin- you need canned pumpkin puree for these muffins, don’t use pumpkin pie filling which has other ingredients added to it that might affect the flavor of your muffins. So, double check the can label, it should contain 100% pumpkin. Organic Pumpkin Puree

Sugar- I like to use both sugars in this recipe, with dark or light brown sugar you will get molasses notes in each pumpkin muffin, which is sublime paired with the warmth of fall spices. Granulated Cane Sugar.

Butter- I love using butter instead of oil in all my baking. You can use vegetable oil, which adds plenty of moisture and richness to these muffins. You could also use coconut oil, which will add a hint of sweetness. 

Milk- a 1/4 cup of milk is not too much at all, so feel free to use any milk you have in the fridge. I used lactose free milk, but almond milk or water works as well.

Vanilla Extract- Using a good vanilla extract will make a difference in taste. I used this organic vanilla bean paste Vanilla Extract.

Step 1- In a small bowl whisk gluten free flour, spices that you have, baking powder, baking soda, and salt until combined and set aside.

Step 2- In a medium bowl whisk together butter, milk, eggs, vanilla, granulated sugar, and brown sugar. Top in the pumpkin purée and whisk until all smooth.

Step 3- Pour the wet ingredients into the bowl with the dry ingredients and mix until just combined. Do not overmix or your muffins will turn tough.

Step 4- Line a muffin pans with paper muffin liners or spray or butter your muffin tin if using non-stick version. Divide the batter equally, fill each one about three quarters of the way.

Bake at 425°F for the first 5 minutes, this will help the muffins puff up, then reduce the temperature to 350°F and bake for 15 minutes or until a toothpick inserted in the center comes out clean. Remove the muffin from the pan and allow them to cool completely on a wire rack.

Pro Tips for making this Recipe

  • Use room temperature ingredients- Set your eggs and milk out on your counter at least 30 minutes to an hour before starting the baking journey. Cold ingredients will make your batter cold. Room temperature ingredients mix together better.
  • Weigh your flour- For a moist, tender pumpkin muffin, it’s better to measure your flour with a kitchen scale. If you don’t have a scale, make sure to fluff up the flour before spooning it into your measuring cup, then level it off with a knife.
  • Don’t over-mix your batter- gently stir the wet ingredients and the dry ingredients until combined and no visible flour clumps. Mixing your batter too much might result into a dry and dense muffin.
  • Pre-heat your oven- starting out with a scorching hot oven at 425° for the first 5 minutes will help them rise and give them that puff professional baked muffins look.
  • Use paper liners in the muffin tin- It will prevent your muffins from sticking catastrophically to the tin. Or if you have a non-stick muffin tin, simply spray it with butter spray.
  • Add chocolate chips on top- If you love chocolate chips either add some to your batter or simply sprinkle on top before popping it to the oven.
  • Add Streusel topping for some texture and crispness- for a crunchy and perfectly sweet finish, add the crisp streusel from my Gluten Free Blueberry muffin, or Gluten-Free Raspberry Muffins on the top of your muffins before popping it in the oven. Instead of using granulated sugar use brown sugar.

Frequently Asked Questions

Can I replace flour with Gluten-Free flour?

No, you can’t just replace gluten-free flour with regular flour in the same gram ratio, but you can measure 1 cup and a half which is equal to 180 to 200 grams.

Gluten-free flour is made from various gluten-free grains, seeds, and beans. Each one has a different protein, starch, and fiber content. Due to this, gluten-free flour does not have the same binding, rising, and texture properties as wheat flour.

In order to achieve the best results with gluten-free flour, you may have to adjust the amounts, add extra liquid or leavening agents, or combine different types. 

Is All Pumpkin Puree Gluten Free?

There needs to be more clarity about what’s gluten-free and what’s not. And when it comes to pumpkins, there are a lot of conflicting opinions.

So, is all pumpkin Puree gluten-free?

I would say yes. All pumpkin Puree is naturally gluten-free. However, depending on their ingredients, some pumpkin products may not be gluten-free.

For example, some brands of pumpkin puree may contain gluten, so it’s always important to check the label before you buy.

Does Baking Powder have Gluten in It?

Yes, baking powder does have gluten in it. It’s because baking powder is made from baking soda and cream of tartar, both of which contain gluten.

Can I Substitute oil for butter?

I love butter in all my baking goods! Vegetable oil is the best oil for muffins because it adds moisture and richness to the batter, and you don’t have to worry about warming up your muffin. You could swap it to coconut oil or olive oil, but both these oils have a strong flavor note that will come through your muffins. 

How can I Store or Freeze these Muffins?

Store the muffins in an airtight container for up to 4 days. Alternatively, you can freeze the muffins for up to 3 months or refrigerate for one week. Place the muffins in a freezer-safe bag and squeeze out as much air as possible.

How can I find Gluten-Free Items?

Look for certified gluten-free baking ingredients to ensure that they are truly gluten-free. Many groceries store now have dedicated gluten-free sections, so check there first. Otherwise, you can find quality gluten-free products at health food stores or online retailers.

Is pumpkin puree the same as pumpkin pie filling?

The key to making these muffins perfect is to use canned pumpkin puree. It can be confusing since the puree and pie are stocked side by side in the grocery store, don’t use the pumpkin pie filling because it has other ingredients added to it that will affect the flavor of the muffins.

These muffins are also best if you use dark brown sugar, as it gives them a richer flavor.


Amazing Gluten Free Pumpkin Muffin

Difficulty:BeginnerPrep time: 10 minutesCook time: 20 minutesRest time: 20 minutesTotal time: 50 minutesServings:2 servingsCalories:200 kcal Best Season:Fall

Description

Elevate your morning routine with these delightful pumpkin muffins! They boast just the right amount of sweetness, a wonderfully soft texture, and are brimming with the unmistakable flavors of autumn. Plus, they maintain their freshness for an entire week when stored in the refrigerator.

Ingredients

Instructions

  1. First, preheat your oven to 425 degrees F. Grease or line a 12-cup muffin tin with paper liners.
  2. In a medium bowl, whisk together the gluten free flour, baking soda, baking powder, cinnamon, nutmeg, cloves, salt.
  3. In a separate bowl, mix the pumpkin puree, melted butter, brown and granulated sugar, eggs, and vanilla extract until smooth.
  4. Add the dry ingredients to the wet ingredients and mix until just combined. Don’t overmix!
  5. Divide the batter equally among the muffin cups.
  6. Sprinkle some extra raw sugar on top of each muffin, if desired.
  7. At 425°F bake the muffins for 5 minutes then reduce the oven to 350° for 10-15 minutes or until they are golden brown, and a toothpick inserted in the center comes out clean. This way will get the muffins to rise quick and bake perfectly soft from the inside and crispy from the top.
  8. Allow cooling completely before serving.
Keywords:Gluten Free Muffins, Fall Muffins

Nutrition Facts

Servings 2

Serving Size 2


Amount Per Serving
Calories 200kcal
% Daily Value *
Total Fat 10g16%
Saturated Fat 2g10%
Trans Fat 0.2g
Cholesterol 28mg10%
Sodium 200mg9%
Potassium 100mg3%
Total Carbohydrate 28g10%
Dietary Fiber 1g4%
Sugars 18g
Protein 3g6%

Vitamin C 1 mg
Calcium 40 mg
Iron 1 mg

* Percent Daily Values are based on a 2,000 calorie diet. Your daily value may be higher or lower depending on your calorie needs.

How to make a delicious Gluten-Free Raspberry Muffins

Indulge in Perfection with Our Gluten-Free Raspberry Muffins!

Get ready to elevate your mornings with a burst of flavor courtesy of our delightful Raspberry Muffins recipe! These muffins boast bakery-quality goodness, brimming with juicy fresh raspberries and crowned with a simple yet irresistible crunchy streusel topping. Prepare to be enchanted by every bite—you’ll find it hard to resist reaching for a second one!

Experience the epitome of fluffy, moist, and flavor-packed delight in every bite with our best-ever gluten-free raspberry muffins. Elevate your taste buds with this tantalizing blend of tender textures and bursting raspberry flavors. A gluten-free treat that’s sure to leave you craving more!

Elevate Your Baking Game with these Irresistible Homemade Raspberry Muffins!

Become a Culinary Hero with Gluten-Free Raspberry Muffins
Prepare to dazzle your kitchen audience with homemade gluten-free raspberry muffins, a favorite that always impresses. Perfect for breakfast or as an afternoon snack, these muffins disappear quickly—doubling the recipe might be wise. They’re infused with zesty lemon, filled with juicy raspberries, and have a soft, fluffy texture that’s utterly delightful.
Effortless and Mixer-Free Baking
These muffins are a breeze to make from scratch without needing a mixer, making them a perfect choice for any baker. If you’re planning ahead, these muffins are ideal for batch baking and stocking up your freezer.
 
Morning Rituals and Freezer-Friendly Delights
Envision starting your day with a warm, homemade muffin and a hot cup of coffee—a guaranteed joy-filled morning ritual. For those looking to fill their freezer with a variety of morning treats, don’t miss out on trying my gluten-free blueberry and pumpkin muffins as well.

What you will need to make this recipe

Perfecting Muffins with the Right Ingredients

Gluten Free Flour- The perfect gluten free flour blend I used is Bod Red’s Mill one to one cup gluten free flour. Gluten Free Flour Blend

Raspberries- Using fresh raspberries in my recipes is something I always aim for, emphasizing the importance of fresh ingredients to enhance flavors. 

Unsalted Butter- The secret behind the muffins’ great flavor and their soft, tender, and moist texture? Unsalted butter, especially when served warm. Although some might consider using vegetable oil to maintain moisture without needing to warm them up, the outcome will differ significantly from using butter.

For those looking to perfect their streusel topping, cold butter is essential for achieving the best results. Should you choose to use melted butter, take care to melt it well in advance. This precaution ensures it cools down sufficiently, avoiding any risk of prematurely cooking the eggs upon mixing.

Vanilla Extract- Adding vanilla extract into the mix elevates the aroma, making the whisking process a truly heavenly experience. I used Vanilla Bean Paste.

How to make Gluten Free Raspberry Muffins

Step 1- In a large bowl, whisk together all dry ingredients.

Step 2- In a separate medium bowl, combine the wet ingredients.

Step 3- Zest the orange into the wet ingredients and mix to combine.

Step 4- Fold the egg mixture into the flour mixture, stirring just until combined.

Step 5- Fold in the raspberries. Avoid over mixing the raspberries as they might end up breaking in your mixture.

Step 6- Add the muffin batter to either a lined or buttered muffin tin, I used both.

Step 7- Make the streusel by cutting the butter into flour mixture with a pie blender or pastry blender cutter measuring at least 1.5mm, mix well until all incorporated.

Step 8- Top the muffins with the streusel and bake for 20-25 minutes or until golden brown on top and the toothpick is dry.

Pro Tips for Mastering This Recipe

  • If you are using frozen raspberries in place of fresh, there is no need to thaw them.
  • Accurate flour measurement is crucial; too much flour can result in dense muffins. Utilize a scale for precise measurements or fluff the flour with a spoon, then level it off with a knife.
  • If skipping paper liners, ensure thorough buttering and flouring of the muffin tin wells.
  • To Check if the muffins are ready, insert a knife or a toothpick into the center of one muffin, and if it comes out dry and clean, they have finished baking.
  •  To ensure the muffins are perfectly baked, simply insert a toothpick into the center of one; if it emerges clean without any batter residue, they’re good to go.
  • Opt for real vanilla extract for an authentic flavor kick.
  • When using frozen raspberries instead of fresh, there’s no need to thaw them beforehand.
  • These muffins toe the line between muffins and cupcakes, offering a tender, cake-like texture. For a cupcake twist, skip the streusel and consider topping them with my luscious Italian Buttercream flavored with a raspberry reduction for an exquisite treat.
  • Store in airtight container after cooling for up to 3 days if made with oil, if made with butter store them in an airtight container in the refrigerator for up to 5 days.
  • For a savory, exquisite taste warm-up your muffin in an oven toaster for 10-15 minutes.
  • Allow your raspberry muffins to cool for at least 10 minutes before removing them from the tin.

Frequently Asked Questions

Can I change the berry?

If you’re feeling adventurous and want to put your own twist on these delectable muffins, go ahead and experiment with a variety of berries to suit your taste buds. Consider incorporating blueberries, blackberries, or even diced strawberries for a vibrant burst of flavor. For a more daring approach, why not divide the batter and introduce different berries to each half—creating a medley of berry goodness in every bite!

Can I change to a different gluten free flour brand?

The result might not be the same, as each gluten free flour brand have a different scale measurement and ingredients.

Can I use a different butter brand?

Feel free to use any unsalted butter brand, I personally like this brand because it’s creamier.

What does it mean to “cut in the butter”?

“Cutting in butter” entails blending cold butter into the dry ingredients to create a crumbly mixture with small butter pieces distributed throughout. Use a pastry blender, forks, or your fingers to achieve this texture, ensuring the butter remains distinct from the flour. Proper incorporation of butter ensures a perfect streusel topping that holds its shape during baking.

Can I freeze these muffins?

Yes, these muffins can be stored in the freezer, by freezing them on a tray until fully frozen, then transfer them to a freezer bag, or simply store them in a 13×9 Pyrex container. Press the air out from the freezer bag and store for up to two months. When you are ready to enjoy them, just thaw them overnight in the fridge and warm up in the microwave or oven toaster.

Freezing Instructions for Future Enjoyment

When it comes to extending the lifespan of these delightful treats, freezing is your best friend. Follow these simple steps to freeze your raspberry (or berry of choice) muffins for later indulgence:

    1. Freeze on a Tray: Place the muffins on a tray in a single layer and pop them into the freezer until they are completely frozen.
    2. Storage in Freezer Bag: Once frozen solid, transfer the muffins into a freezer bag. Squeeze out any excess air before sealing the bag tightly.
    3. Storage Duration: Your frozen muffins can be safely stored for up to two months without compromising their taste and quality.
    4. Thawing and Reheating: When the craving strikes, remove the desired number of muffins from the freezer and thaw them overnight in the refrigerator. To enjoy them warm, simply reheat in the microwave or defrost gently using the microwave.

With these freezing tips at your disposal, you can always have a stash of your favorite berry-infused muffins ready to brighten up your day whenever the mood strikes!

Please- If you’ve tried these gluten free raspberry muffins recipe, then don’t to rate the recipe and let me know how you like them in the comments below. I would love hearing from you! Thank you,

Amazing Gluten-Free Raspberry Muffins

Difficulty:BeginnerPrep time: 30 minutesCook time: 40 minutesRest time: 40 minutesTotal time:1 hour 50 minutesCooking Temp:100 CServings:4 servingsEstimated Cost:25 $Calories:300 kcal Best Season:Available

Description

“Get ready to kickstart your morning with sheer excitement courtesy of our fluffy gluten free Raspberry Muffins recipe! Packed with juicy raspberries and crowned with delectable crunchy streusel topping, these bakery-quality delights are simply irresistible. Prepare to fall head over heels for every mouthful- Gluten free breakfast has never tasted this good!”

Ingredients

Streusel Topping

Instructions

  1. In a bowl whisk all the dry ingredients and set aside.
  2. In another bowl, add the eggs, the milk and the juice, the butter, and vanilla extract then zest either the orange or the lemon, and whisk all these wet ingredients.
  3. Add that sunny beautiful color of the liquid mixture that smells amazing to the flour mixture.
  4. Fold the batter together until everything is wet.
  5. It’s okay if you still can see some pockets of flour.
  6. Add the raspberries and fold them gently into the mixture, you will no longer see the pockets.
  7. Set the batter aside then grease or line a 12-cup muffin tin with paper liners.
  8. Divide your muffin batter evenly among your 12 muffin cups.
  9. It’s time to top that delicious streusel we made earlier.
  10. Top some raspberries on for an extra color and yumminess.
  11. Bake for 20-25 minutes or until a toothpick inserted comes out clean.
  12. Let cool in the tin for 5 minutes before transferring to a wire rack to cool completely.
  13. Streusel Topping Instructions

  14. In a bowl add all your dry ingredients, add the butter and start working the mix with your hands.
  15. I like to use cold butter, but let me know in the comment below, if you like to make your streusel with melted butter and why do you prefer it that way.
  16. Set aside and now let’s make these delicious muffins.

Notes

  • My favorite Gluten Free flour to use is Bob’s Red Mill one to one cup baking flour.
    To keep that bright, buttery and fluffy color, I used but if you prefer to use brown sugar, it will change the color of your muffin.
    I used in this recipe lactose free milk, but you can substitute with dairy milk, almond milk or coconut milk.
    Preferably room temperature eggs, it helps with the texture of your muffin and creates a moist center.
    Fresh or frozen, I prefer using fresh raspberries.
    I am not using this baking soda because I want my muffins to look nice and light.
    Use melted butter for added moistness and flavor but you can substitute with olive oil or any other oil of your choice, or you can do 1/4 cup oil and 1/4 cup butter.
    Adding orange zest and juice to your raspberry muffins adds a bright, citrusy flavor that complements the sweetness of the raspberries perfectly.
Keywords:Delicious Gluten Free Raspberry Muffin

Nutrition Facts

Servings 12

Serving Size 2


Amount Per Serving
Calories 300kcal
% Daily Value *
Total Fat 3g5%
Saturated Fat 2g10%
Trans Fat 1g
Cholesterol 2mg1%
Protein 1g2%

* Percent Daily Values are based on a 2,000 calorie diet. Your daily value may be higher or lower depending on your calorie needs.

How to make an amazing GF Blueberry Muffin

The Best Ever Gluten-Free Blueberry Muffins

“Indulge in the best gluten-free blueberry muffins, bursting with juicy blueberries and a perfect soft texture. Ideal for breakfast or snacks, these healthy treats are a delight for anyone seeking a guilt-free indulgence. Discover the joy of gluten-free baking today!”

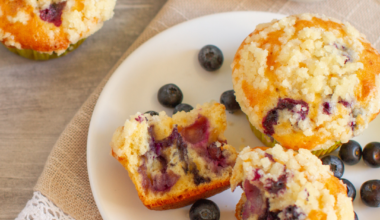
Why bother with a trip to the bakery when you can whip up mouthwatering homemade Blueberry Muffins right in your own kitchen? With a delicate, sweet crumb and bursts of juicy berries, these muffins are an utterly irresistible indulgence!

Indulging in the divine essence of a classic blueberry muffin, generously speckled with luscious berries, and paired with a cozy cup of morning coffee is an unparalleled delight for our taste buds. Whether it’s the dawn of a new day or a tranquil afternoon, the allure of a freshly baked muffin satiates a craving unlike anything else. These blueberry muffins, brimming with plump, succulent berries, effortlessly come together in mere minutes, ensuring that the comfort of homemade goodness is always within arm’s reach.

Moreover, crafted with simple ingredients and straightforward steps, these muffins extend a warm invitation even to the most inexperienced baker. Whether seeking solace in the therapeutic rhythm of afternoon baking or yearning to surprise loved ones on a leisurely Saturday morning, these easy blueberry muffins offer a delectable solution! Dive deeper into the world of blueberry delights and discover more tantalizing recipes on my blog, Gluten-Free Raspberry Muffins, Gluten Free Pumpkin Muffin.

This beautiful recipe for Gluten-Free Blueberry Muffins has all the comforting flavors and aromas of your favorite morning treat, with none of the gluten! Discover how easy gluten-free baking can be with this stress-free recipe!

What you will need to make this Recipe

Gluten-Free Flour – it makes the base of your dry ingredients. There are many options available, and you can use your favorite; however, if you’re unsure what type of gluten-free flour is best, try baking with rice flour or a gluten-free all-purpose flour blend. Both choices are available in the baking aisle, and both produce great textured muffins. Bob Red’s Mill 1-1 Cup Gluten Free Flour.

Whole Milk – In this muffin recipe, milk helps thin out the batter and adds creamy, richness to the final flavor. Whole milk is a great choice, with or without lactose.

Greek Yogurt – A little tangy yogurt brings some much-needed acid to these irresistible muffins. Use plain yogurt, not flavored. Greek Yogurt

Unsalted Butter – butter adds the rich and creamy fat needy to bring this recipe together. For lighter and fluffier muffins melt the butter before starting this recipe. If desired, you can swap half of the butter for vegetable oil.

Lemon Zest – the zest of the lemon has a bold citrus flavor that makes this recipe sing!

Lemon Juice – this bright citrus balances the dark blueberry flavor perfectly. Use freshly squeezed or bottled for this recipe, but it is best to use fresh it’s like a perfect marriage with Blueberries.

Vanilla Extract – a touch of vanilla flavor makes these berry-filled muffins pop! Use a pure vanilla extract if possible. Vanilla Bean Paste.

How to make Gluten Free Blueberry Muffins

  1. First, pre-heat oven to 375°F and line up muffin tin with paper liners. In a medium bowl, whisk together the gluten free flour, baking powder, baking soda and salt.In a small bowl, toss the blueberries with a tablespoon of the dry mixture to combine. Doing this will prevent the berries from sinking to the bottom of the batter.

      3.  In a large bowl, beat the eggs, butter, vanilla extract and sugar together on a medium speed about 3 minutes until fluffy.

      4. Pour 1/3 of the dry ingredients into the wet ingredients and whisk together. 

      5. Pour and mix half of the milk into the batter, then alternate mixing in 1/3 of the flour mixture followed by the rest of the milk, yogurt   and remaining flour until combined.

      6. Gently fold in the floured blueberries.

      7. Divide the batter equally among the muffin pan liners.

     8. Sprinkle the streusel on top of each muffin and if desired, scatter more blueberries on top. Bake for 20 minutes or until the toothpick inserted into the center comes out dry with moist crumbs. Let the muffins cool in the tin for 5 minutes before removing them and placing them on a wire rack to cool for 15 to 20 minutes.

Tips and Tricks for making this Recipe

  • Don’t skip tossing the berries in the flour mixture, this prevents them from sinking in the bottom of the muffins.
  • Use an ice cream scoop or larger Disher to fill the muffin tin so every portion comes out even.
  • Check these muffins using the toothpick test, if the toothpick comes out dry the muffins are done.
  • You can substitute sour cream for yogurt.
  • Eggs, milk, and yogurt should be room temperature which help the muffins to bake beautifully and evenly.
  • You can substitute milk for any nondairy milk of your choice or even use water, but I am not sure if the result will be the same taste and texture.

How to Serve These Gluten-Free Blueberry Muffin

Enjoy these muffins while they’re warm with a little spread of butter, apple sauce, or simply some apples, or try them after they’ve cooled for a great on-the-go snack. They are the perfect mate for orange juice, coffee, oat milk Matcha latte or even a mimosa!

Any way you slice them, these awesome Gluten-Free Blueberry Muffins are loaded with berries and great for any occasion!

Can You Store Gluten-Free Blueberry Muffins?

To store these tasty muffins, allow them to cool then move them to an airtight container. These muffins can be kept on the counter for up to 4 days, up to one week in the refrigerator and up to three months in freezer, if you can resist them for that long like me 🙂

Reheat them in the microwave or toaster oven, or simply enjoy them at room temperature, it is your choice, but I definitely enjoy them even after 10 days in the refrigerator warmed up in a toaster oven.

Please leave me a comment below if you try this recipe.

Thank you!

Amazing Gluten Free Blueberry Muffin

Difficulty:BeginnerPrep time: 10 minutesCook time: 20 minutesRest time: 20 minutesTotal time: 50 minutesServings:12 servingsCalories:540 kcal Best Season:Available

Description

Discover the ultimate gluten-free blueberry muffin recipe! Indulge in tender, heavenly flavorful muffins bursting with juicy blueberries. Perfect for gluten-sensitive diet. Try it and you will not be disappointed!

Ingredients

Ingredients for the Optional Streusel Topping

Instructions

  1. Preheat your oven at 375°F.
  2. Grease or line up a muffin tin with muffin liners.
  3. In a bowl add all the dry ingredients and whisk together gently.
  4. In a Separate bowl, add the room temperature eggs, and whisk for just few minutes, then add all the other wet ingredients. Whisk gently, no need to over mix.
  5. Add a few pinches of the dry mix into a small bowl and gently toss the blueberries in this flour mixture, this will prevent the blueberries from sinking to the bottom of the muffins. 
    Add the dry ingredients to the wet and gently whisk to combine.
  6. Carefully fold in the blueberries.
  7. Use a large scoop to fill the prepared muffin tin with batter.
  8. Top with extra blueberries and optional streusel topping, which will give the muffins a nice finish.
  9. Bake for 20 minutes or until fully puffed up and golden brown, you will notice especially after the toothpick comes out dry.

Notes

  • Please leave me a comment below if you have tried this recipe. Happy Baking!!!
Keywords:Gluten Free Blueberry Muffins, Best Gluten Free Blueberry Muffins

Nutrition Facts

Servings 12

Serving Size 2


Amount Per Serving
Calories 230kcal
% Daily Value *
Total Fat 9g14%
Saturated Fat 5g25%
Trans Fat 0.2g
Cholesterol 50mg17%
Sodium 200mg9%
Potassium 75mg3%
Total Carbohydrate 30g10%
Dietary Fiber 1g4%
Sugars 15g
Protein 5g10%

Vitamin A 300 IU
Vitamin C 2 mg
Calcium 72 mg
Iron 1 mg

* Percent Daily Values are based on a 2,000 calorie diet. Your daily value may be higher or lower depending on your calorie needs.

Nutrition Facts

Serving Size1 Muffin
Servings6
Amount Per Serving
Calories540
% Daily Value *
Total Fat23g
36%
Saturated Fat13g
65%
Carbohydrates 76g

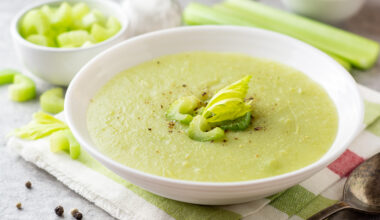
How to make an Amazing Celery Soup

A nourishing bowl of Celery Soup—wholesome, budget-friendly, and bursting with flavor, all ready in just 35 minutes. It’s the epitome of health-conscious indulgence, deliciously satisfying, and easily adaptable for vegans.

Get ready to cozy up to our Simple Celery Soup—it’s creamy, decadent, and oh-so soothing! Longtime followers know my knack for transforming everyday ingredients into culinary marvels. 

Love Soups? Try my creamy vegetable Soup.

Consider this Celery Soup as the perfect beginning to a lavish feast or as a comforting homemade supper paired with crusty bread or Cheesy biscuit.

Here, I’ve adorned the soup with a delightful array of crispy celery leaves, toasted nigella seeds, and hemp seeds, but feel free to get creative with your toppings.

Croutons are always a classic choice, or you could try something new like Salmas croutons for a savory twist, or super seeds croutons if you prefer to go grain-free.

Don’t underestimate the elegance of crispy celery leaves—they’re not only visually stunning but also incredibly easy to prepare.

Nigella Seeds, commonly found in Indian and Middle Eastern cuisine, impart a robust, oniony-peppery flavor when toasted in a bit of oil. While not essential to the recipe, they add a delightful complexity. If you have them on hand, give them a try—they’ll take your soup to the next level!

Let me tell you, the health perks of celery are endless—seriously, just give it a quick Google search!

From battling inflammation to reducing cholesterol and blood pressure, not to mention its powerhouse status in antioxidants, celery packs a punch in the wellness department.

But let’s talk flavor—I am absolutely smitten with it. Personally, I’m all about stuffing celery stalks with almond butter and a sprinkle of sea salt and fresh cracked pepper. Talk about a tasty snack!

Despite its ubiquity, celery is a true hero when it comes to enhancing flavors. And let me tell you, indulging in a bowlful of this Celery Soup with warm, toasty bread? It’s nothing short of sensational!

Here’s hoping you find it just as delightful!

What you will need to make this soup

  • Ghee ButterIt adds a nice creamy, buttery flavor to the soup. 
  • Olive Oil: It adds a whole new dimension of flavor, taking a soup from so-so to a spectacular.
  • Bay Leaf: It adds a subtle flavor layer that lends more depth to the soup.

Pro Tips for making a delicious Celery Soup

  1. Sauté Aromatics: Start by sautéing onions, garlic, or leeks in a bit of olive oil or butter to add depth of flavor to your soup base.

  2. Include Potatoes: Adding potatoes to your celery soup not only enhances its creaminess but also provides a subtle sweetness that balances the flavor of the celery.

  3. Use Fresh Celery: Opt for fresh, crisp celery stalks for the best flavor and texture. Avoid celery that looks wilted or has brown spots.

  4. Thinly Slice Celery: To prevent fibrous texture in your soup, thinly slice the celery stalks before cooking.

  5. Add Fresh Herbs: Enhance the flavor profile of your celery soup by incorporating fresh herbs like thyme, parsley, or dill. Add them towards the end of cooking for maximum flavor.

  6. Finish with a Splash of Acid: A squeeze of lemon juice or a splash of white wine vinegar just before serving can brighten up the flavors of the soup and add a refreshing touch.

  7. Experiment with Toppings: Get creative with toppings like crispy bacon, toasted nuts or seeds, croutons, grated cheese, or a dollop of sour cream to add texture and depth to your soup.

  8. Blend Carefully: For a smooth and creamy texture, use an immersion blender or countertop blender to puree the soup until smooth. Be cautious when blending hot liquids to avoid splattering.

  9. Adjust Seasoning: Taste your soup before serving and adjust the seasoning as needed with salt, pepper, or your favorite herbs and spices.

  10. Let it Rest: Allow your celery soup to rest for a few minutes after cooking to allow the flavors to meld together before serving. This will result in a more flavorful and cohesive dish.

Frequently Asked Questions

Can celery soup be made vegan?

Absolutely! Celery soup can easily be made vegan by using vegetable broth and opting for plant-based cream substitutes.

How can I add flavor to celery soup?

You can enhance the flavor of celery soup by adding ingredients like onions, garlic, herbs, spices, or even a splash of lemon juice.

Can I freeze celery soup?

Yes, you can freeze celery soup for later consumption. However, it’s best to freeze it without any dairy products and add them in when reheating to maintain the soup’s texture and flavor.

What are some serving suggestions for celery soup?

Celery soup pairs well with crusty bread, crackers, croutons, or a sprinkle of cheese on top. You can also garnish it with fresh herbs or a drizzle of olive oil for added flavor.

 How long does celery soup last in the refrigerator?

Celery soup can typically last in the refrigerator for 3-4 days when stored in an airtight container. Be sure to cool it down completely before refrigerating.

What will you serve with this soup? Let me know in the comment box below 🙂 I hope you enjoy this recipe as much as I had. 

Amazing Celery Soup

Difficulty:BeginnerPrep time: 15 minutesCook time: 20 minutesRest time: minutesTotal time: 35 minutesServings:6 servingsCalories:180 kcal Best Season:Available

Description

Savor the comfort of a nourishing bowl of Celery Soup—wholesome, budget-friendly, and bursting with flavor, all ready in just 35 minutes. It’s the epitome of health-conscious indulgence, deliciously satisfying, and easily adaptable for vegans.

Ingredients

Instructions

  1. In a pot over medium heat add ghee and olive oil.
  2. Add the onions and garlic and sauté for 6 minutes.
  3. Add half of the diced celery, sauté for 5 minutes, then add all the diced vegetables except the rest of the celery and sauté for 5 minutes.
  4. Season the vegetables with the black pepper, ginger and turmeric.
  5. Add the rest of the celery and chicken broth, and cook until all the vegetables are tender.
  6. Set aside to cool down and use an immersion blender to purée the soup to your desired consistency.
  7. Garnish with diced celery, diced parsley or diced cilantro before serving.

Notes

  • When opting for cashew cream, a hint of lemon juice can truly elevate the soup’s flavors. However, if you’re using sour cream or yogurt, their inherent tanginess might render the addition unnecessary.
  • For a speedy vegan rendition using cashew cream, simply toss half a cup of cashews into the simmering pot alongside the celery and potatoes to soften them up, then blend everything together seamlessly!
  • To ensure a smooth texture, thinly slicing the celery will prevent any fibrous bits from detracting from the soup’s creaminess.
  • When freezing this delightful concoction, it’s advisable to omit the sour cream initially, as it may develop a granular texture. Simply add it in later when reheating for optimal enjoyment.

Lemon-garlic-mashed-broccoli

No matter what life throws at us, eating comfort food is always a great way to soothe ourselves and be fulfilled. When I create recipes, I like to use healthy ingredients that are not only delicious but filling. 

After being inspired by Moroccan Zaalouk, I decided to make Garlic Mashed Broccoli that’s both delicious and easy to make. Here are three reasons why you should try my Garlic Mashed Broccoli recipe; My garlic Mashed Broccoli is easy to make, this dish serves as an excellent side dish, and the recipe is full of nutrients and flavor. 

What is Moroccan Zaalouk? 

Moroccan Zaalouk is a vegetable dish, often served as part of a mezze (also spelled mézzeh or mezzah) in Middle Eastern and North African cuisine. Zaalouk is traditionally made with eggplant, tomatoes, bell peppers, onion, and garlic which are cooked in olive oil and seasoned with cumin and salt. You can replace vegetables with others like cauliflower or mushrooms or add meat for a complete meal. 

Zaalouk has been eaten for centuries in Morocco; it is a common meal served for lunch or dinner throughout Morocco. When I first tasted Zaalouk, I knew that my Garlic Mashed Broccoli would taste delicious with it. Zaalouk can be prepared as an appetizer, main course, or side dish. It tastes great with fish, chicken, and lamb. You can eat Zaalouk by itself or you can enjoy it with bread; It is so easy to make. 

Side note: If you love Zaalouk, you need to try my Carrot Zaalouk Recipe. 

Something Quick and Easy 

This garlic mashed broccoli is ready in less than 30 minutes, so it’s perfect for a quick weekday dinner. You can also make it ahead of time and store it in an airtight container in your fridge for up to 5 days. Don’t worry about reheating—it tastes just as good after chilling! 

This comfort food is also easy on your wallet: At only $1.99 per serving, garlic mashed broccoli is one of the most affordable dishes I have made in a long time. The Garlic Mashed Broccoli recipe has 3 main ingredients: broccoli, garlic, and spices; served with crackers or cookies (or both!) it will be gone before you know it. 

It’s an Excellent Side Dish 

Garlic has been shown to lower blood pressure, and when paired with other delicious healthy ingredients such as broccoli, it tastes even better. 

Since I discovered how easy it is to make your own garlic mashed broccoli, I have been making a batch every week. 

It’s an excellent side dish for dinner parties or family gatherings. In fact, since coming up with my Garlic Mashed Broccoli recipe, I have started serving homemade Garlic Mashed Broccoli instead of mashed potatoes at family dinners. 

Another bonus is that you only need twenty minutes to cook! The most difficult part of cooking your own recipe is trying new flavors and discovering what works and what doesn’t; but after you’ve made this dish for the first time, you can prepare whatever combination you want. So be creative! 

Keto-Friendly 

Lucky for us Broccoli is a keto-friendly food. It is naturally high in fiber and non starchy. Eating broccoli has unique health benefits. 

Did you know that Broccoli is anti-aging, anti-inflammatory, and it’s great for your eye health? 

Wondering if you can have sour cream on keto? Yes, you can have sour cream. The main ingredients of sour cream are milk and cream. This means that it is low in carbs and fat. If your diet allows for a high intake of saturated fats, then you will benefit from consuming dairy products. Sour cream contains healthy bacteria called probiotics which support digestive health. It also contains Vitamin A, B-complex vitamins like folate and vitamin K. 

Lemon Garlic Mashed Broccoli 

Prep Time  Cook Time  Total Time
10 Minutes  20 Minutes  30 Minutes

First, gather your ingredients.

 Ingredients 

  • 2-3 heads of broccoli 
  • 10 garlic cloves (diced) 
  • 1/3 cup fresh chopped parsley and cilantro 
  • 1 tbsp. of paprika 
  • 1/2 tsp cumin 
  • 1/2 tsp coriander 
  • 1/8 tsp cayenne pepper 
  • 1/8 tsp black pepper 
  • 1/2 cup olive oil 
  • Juice of one lemon (I used one and a half) per your preference 
  • 1/2 tsp salt 

Instructions 

  1. Wash broccoli thoroughly, cut it to small florets
  2. In a saucepan, boil water 
  3. Add broccoli to boiling hot water pan until it is tender (about 3 to 5 minutes). 4. In a medium saucepan, over medium heat add half of the olive oil, add 3/4 of garlic then sauté mixture for 1 minute. 
  4. Add broccoli and sauté for 5 minutes. 
  5. Using a potato masher, mash broccoli. 
  6. Add the cilantro, and parsley, the rest of garlic, olive oil, and lemon. Sauté for another 5 mins.
  7. Serve hot and enjoy with your choice of bread, crackers, or toast accompanied with grilled chicken, steak, or fish. 

Serving Garlic Mashed Broccoli 

This recipe is a great appetizer. 

In addition to Moroccan Zaalouk, here are a few other dishes that pair well with broccoli: tabbouleh (by far my favorite), soup and crackers, quiche, lasagna, and pasta. Try them all and discover your favorites. 

Don’t want to use Chives? Try scallions, leeks, or even shallots. You can also add a dollop of sour cream to your garlic mashed broccoli for a cool surprise. 

The possibilities are endless! Prepare it your way and let me know how you like it and what you served it with. Comment below, I would love to hear from you. Don’t forget to include pictures too; remember pictures tell a thousand words! 

The Best Fall Vegetable Curry

Vegetable curry with rice

The fall months are here, and we all want to stay warm and cozy. On cooler nights, I’m sure everyone craves warm, delicious, fragrant dishes that will help us fulfill our cravings but also provide us with the much-needed nourishment we need to stay healthy.

A vegetable curry is perfect for those who enjoy meat but don’t mind vegetables every now and then, especially as it gets colder. If you’re a vegetarian, then you will obviously love this foolproof recipe. If you’re not aware of what a curry is, let us enlighten you before getting into the recipe.

The curry recipe we’re about to present you with has the delicious autumnal flavors of sweet potato and cauliflower, so your cozy nights are made warmer.

All About Curry

Curry’s origin is in the Indian Subcontinent, and the word basically comes from the word “Kari”, which is a Tamil word that means sauce or soup that people eat with rice. Curry is made with loads of spices mixed together, including but not limited to turmeric, red chillis, coriander, and cumin.

Curries can be wet or dry, depending on how much gravy or sauce is present in the dish. Many people first mix and roast or fry the spices separately in oil and then add them to the dish, making the curry look like a stir-fry dish. In Thailand, people just add spices directly into the curry. Curry is extremely loved in the Indian Subcontinent, and vegetable curry is great for keeping people warm in the cold months.

Here are a few vegetables and foods that are great in helping you stay warm.

Essential Winter Foods

Root Vegetables

Root vegetables are vegetables that grow in the ground like sweet potatoes, turnips, and radishes. Sweet potatoes are great for maintaining your skin health as well. These vegetables help produce heat in your body through the process of metabolism. These vegetables take longer to digest, so the elongated process of metabolism will keep your body temperature up. Incorporating these vegetables in your soups and curry is the key.

Vegetable curry in a white ceramic bowl

Spices

​​Spices are not just flavorsome but also generate a little heat that keeps you warm for longer. Cumin, sesame seeds, turmeric, pepper, and cinnamon are the best spices to incorporate in your delicious fall curry.

Cinnamon is great for raising your body temperature by increasing your metabolism rate. Cumin keeps your body warm, and turmeric gives heat to your food. Pepper and sesame seeds have incredible health benefits, especially for cold months. Pepper helps keep the flu away, and sesame seeds are great for combatting respiratory diseases.

Now that you’re aware of some general facts, let’s get into the recipe.

Ingredients

  • 1 large roughly chopped onion
  • 4 cloves of peeled garlic
  • 1 1.5-inch length ginger (peeled, fresh, and thinly sliced)
  • 1 ½ tablespoon of yellow curry powder
  • ¼ teaspoon cayenne pepper(plus more according to taste)
  • 2 tablespoons oil (canola or olive)
  • 2 ¼ tablespoons tomato paste
  • 2 cups of vegetable broth (low-sodium)
  • 1 cup coconut milk
  • 1 stick of cinnamon
  • ¼ teaspoon of black pepper (fresh, ground) plus more according to taste
  • ½ head cauliflower (break it into 1½-inch-wide florets) (should measure about 3 cups)
  • 1 pound sweet potatoes (fresh, peeled, and properly cut into 1-inch cubes)
  • 2 large carrots (peeled and cut into 1-inch round slices)
  • 2 tomatoes (chopped and cored)
  • 1 lime’s zest grated
  • 2 tablespoons of lime juice (freshly squeezed)
  • 1 can of 15-ounce chickpeas (with no-salt, properly rinsed and drained)
  • 5 cups spinach (fresh baby leaves)
  • ¾ teaspoon of salt
  • ¼cup of cilantro leaves (freshly chopped)
  • 3 cups of your preferred rice serving

Nutritional Value

This curry serves six people and has 380 calories per serving.

A person slicing vegetables

Instructions

Step 1

First, add the onions, ginger, garlic, cayenne pepper, and curry powder to your food processor and combine them properly. Add oil into the processor and keep processing till a smooth puree is made.

Step 2

Now take out the puree from the processor and transfer it into a large pot and let it cook over medium heat. Keep stirring continuously for 4 to 5 minutes. Time to add the tomato paste. Let the puree cook more and keep stirring for five more minutes until your mixture’s color changes and darkens.

Step 3

Now add the vegetable broth, cinnamon stick, black pepper (¼ teaspoon), and coconut milk to the mixture and bring it to a boil. You can reduce the heat and let the mixture simmer for 8 to 10 minutes.

Step 4

Time to add the delicious vegetables. Add sweet potatoes, cauliflower florets, tomatoes, potatoes, carrots, season everything with salt and pepper, and let everything boil again. You can reduce the heat to medium-low and cover the pot so the vegetables can simmer until they are tender or soft. This could take 20 to 25 minutes.

Step 5

Take out the cinnamon stick from your pot and add lime zest, chickpeas, spinach, and lime juice. Let the mixture cook until the spinach has wilted. This could take about 4 to 5 minutes.

Step 6

Season your curry with ¾ teaspoon salt, garnish it with cilantro leaves, and serve with rice.

vegetable curry

What to Serve With

Personally, we would love this curry with brown rice, but basmati rice would work great too. You can even make cauliflower rice if you’re looking for a low-carb alternative. Sprinkle some nuts like peanuts, pinenuts, or cashews on top to give the curry an extra crunch.

If you want to go completely typical Indian, have the curry with flatbread or naan bread.

Storing Your Curry

You can store your curry overnight in an airtight container in the fridge. You can also leave it in the fridge for three days, and if you want to leave it for three months, the freezer is your best bet.

Looking for more healthy food recipes?? Cali Yum is your solution. We are a healthy food blog, and we’re committed to bringing you a variety of savory and sweet recipes, including Gluten-free Moroccan and Gluten-free Mediterranean recipes packed with flavor. Connect with us today to fulfill your cravings for delicious gluten-free recipes and gluten-free dishes.


Cabbage Salad

A simple and easy cabbage salad to make.

This warm cabbage salad is a healthy plant based dinner sidee or can be main! A spicy, crunchy and flavorful inspired cabbage salad to enjoy at any meal or with bread. Pot luck, paleo, vegan friendly and easy to make.

I never liked cabbage before due to the stingent smell of it especially when steamed or boiled. Knowing the whopping benefits of eating cabbage i focused my attention in exploring more recipes and healthy ways to incorporated into my diet.

Did you know that cabbage is considered a cancer killer cruciferous vegetable? No i didn’t but you might’ve.

Good to know the benefits

  • Reduces inflammation
  • Regulate blood sugar
  • Promote weight loss
  • Contain cancer-fighting compounds
  • Helps with estrogen balance and
  • Enhances heart health

So, few months ago i got home while starving and tired to go shopping or even order something to go. I checked my refrigerator for a quick fix meal and found not much with the exception of few items.

Yay!! I found cabbage, onions, garlic, cilantro and lemons. That’s should be a good start!! But wait, how am i going to cook this cabbage?

Being gluten free i make different satisfying and moroccan inspired salads. Instantly i thought to expirement with cabbage instead, let’s make cabbage salad or zaalouk similar to eggplant or zucchini.

What you need….

  • half cabbage head
  • 8 garlic cloves
  • olive oil
  • cilantro
  • parsley
  • lemon
  • cumin
  • paprika
  • cayenne pepper
  • hot sauce
  • one frying pan
  • one regular pot to boil and cook cabbage
  • strainer
  • spatula

Ingredients

  • Half cabbage head
  • 4 Tbsp. olive oil
  • 4 Tbsp. cilantro
  • 2 Tbsp. parsley
  • 1/2 Tsp. cumin
  • 1/2 Tsp. paprika
  • 1/8 Tsp. cayenne pepper
  • 4 drops of hot sauce
  • 8 garlic cloves
  • 1/2 Tsp. of salt
  • A juice of half lemon

How to make cabbage salad

  1. Slice thin half of the cabbage
  2. Add two cups of water and salt to a pot
  3. Transfer the thin sliced cabbage to the pot alongside with two garlic cloves
  4. Boil for 20 mins or until cabbage is a bit tender
  5. In a frying pan over medium heat add olive oil and transfer strained cabbage and sautee for five minutes
  6. Add minced garlic and sautee for another five minutes
  7. Add cilantro, parsley, spices and lemon juice
  8. Stir all and turn off the heat and set aside to cool down
  9. Serve as a side or main

I promise you that as soon as you take the first bite of this delicious, addictive salad you will never stop making it.

This error message is only visible to WordPress admins

Error: No feed found.

Please go to the Instagram Feed settings page to create a feed.