Cali
CaliThe Ultimate Healthy Lentil Bread
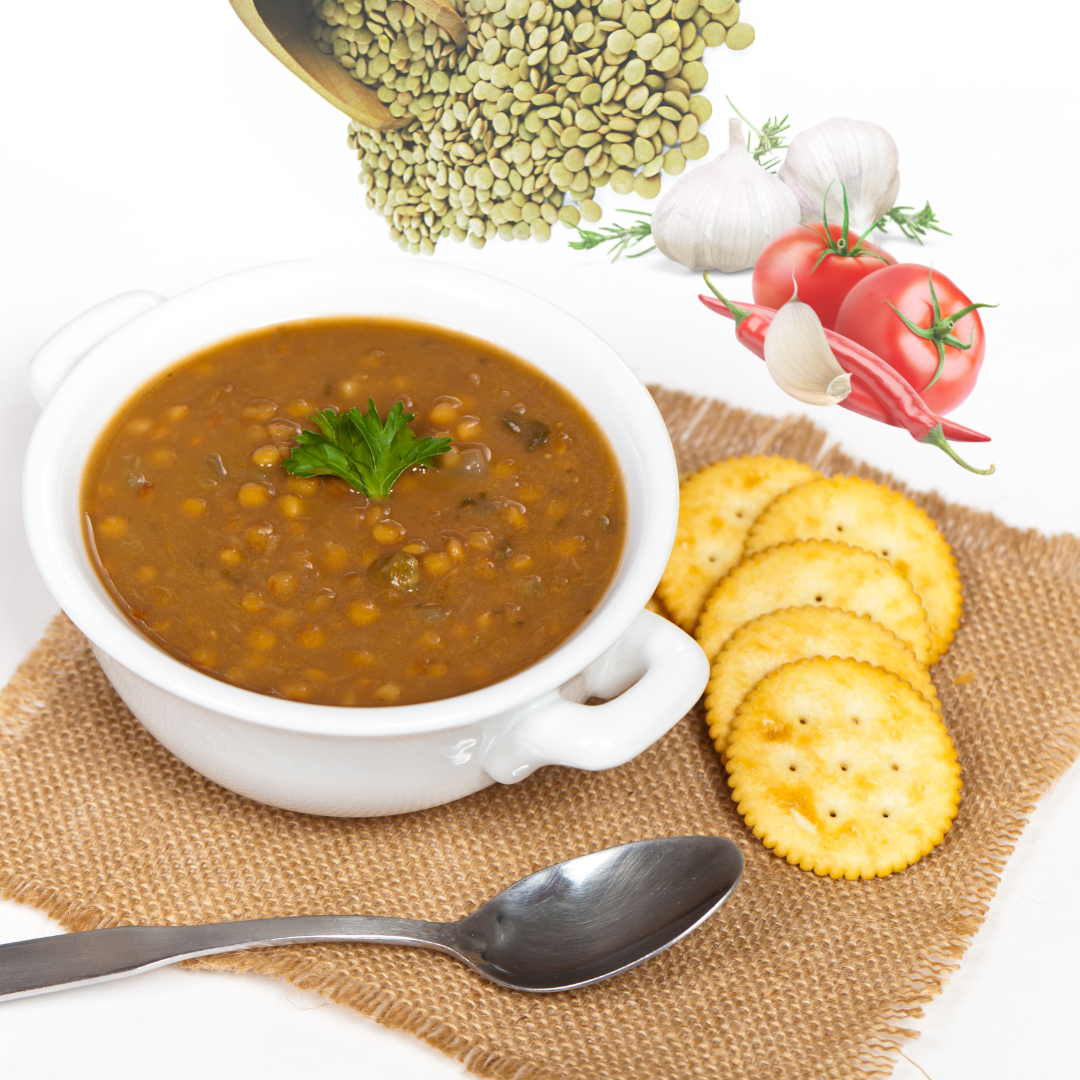
Are you on a quest for the perfect gluten-free bread? Look no further! Our gluten-free lentil bread rolls are not only easy to make but also packed with nutrients and flavor. Whether you’re a gluten-free enthusiast, a passionate home cook, or simply someone looking to eat healthier, this recipe is sure to become a favorite.
Why Choose Gluten-Free Lentil Bread?
Gluten-free bread has gained popularity among health-conscious individuals, and for good reason. Traditional bread can be heavy and laden with gluten, which some people find hard to digest. Our lentil bread rolls are:
- Nutritious: Lentils are high in protein, fiber, and essential vitamins and minerals.
- Gluten-Free: Perfect for those with gluten intolerance or celiac disease.
- Easy to Make: With simple ingredients and straightforward steps, you can enjoy homemade bread in no time.
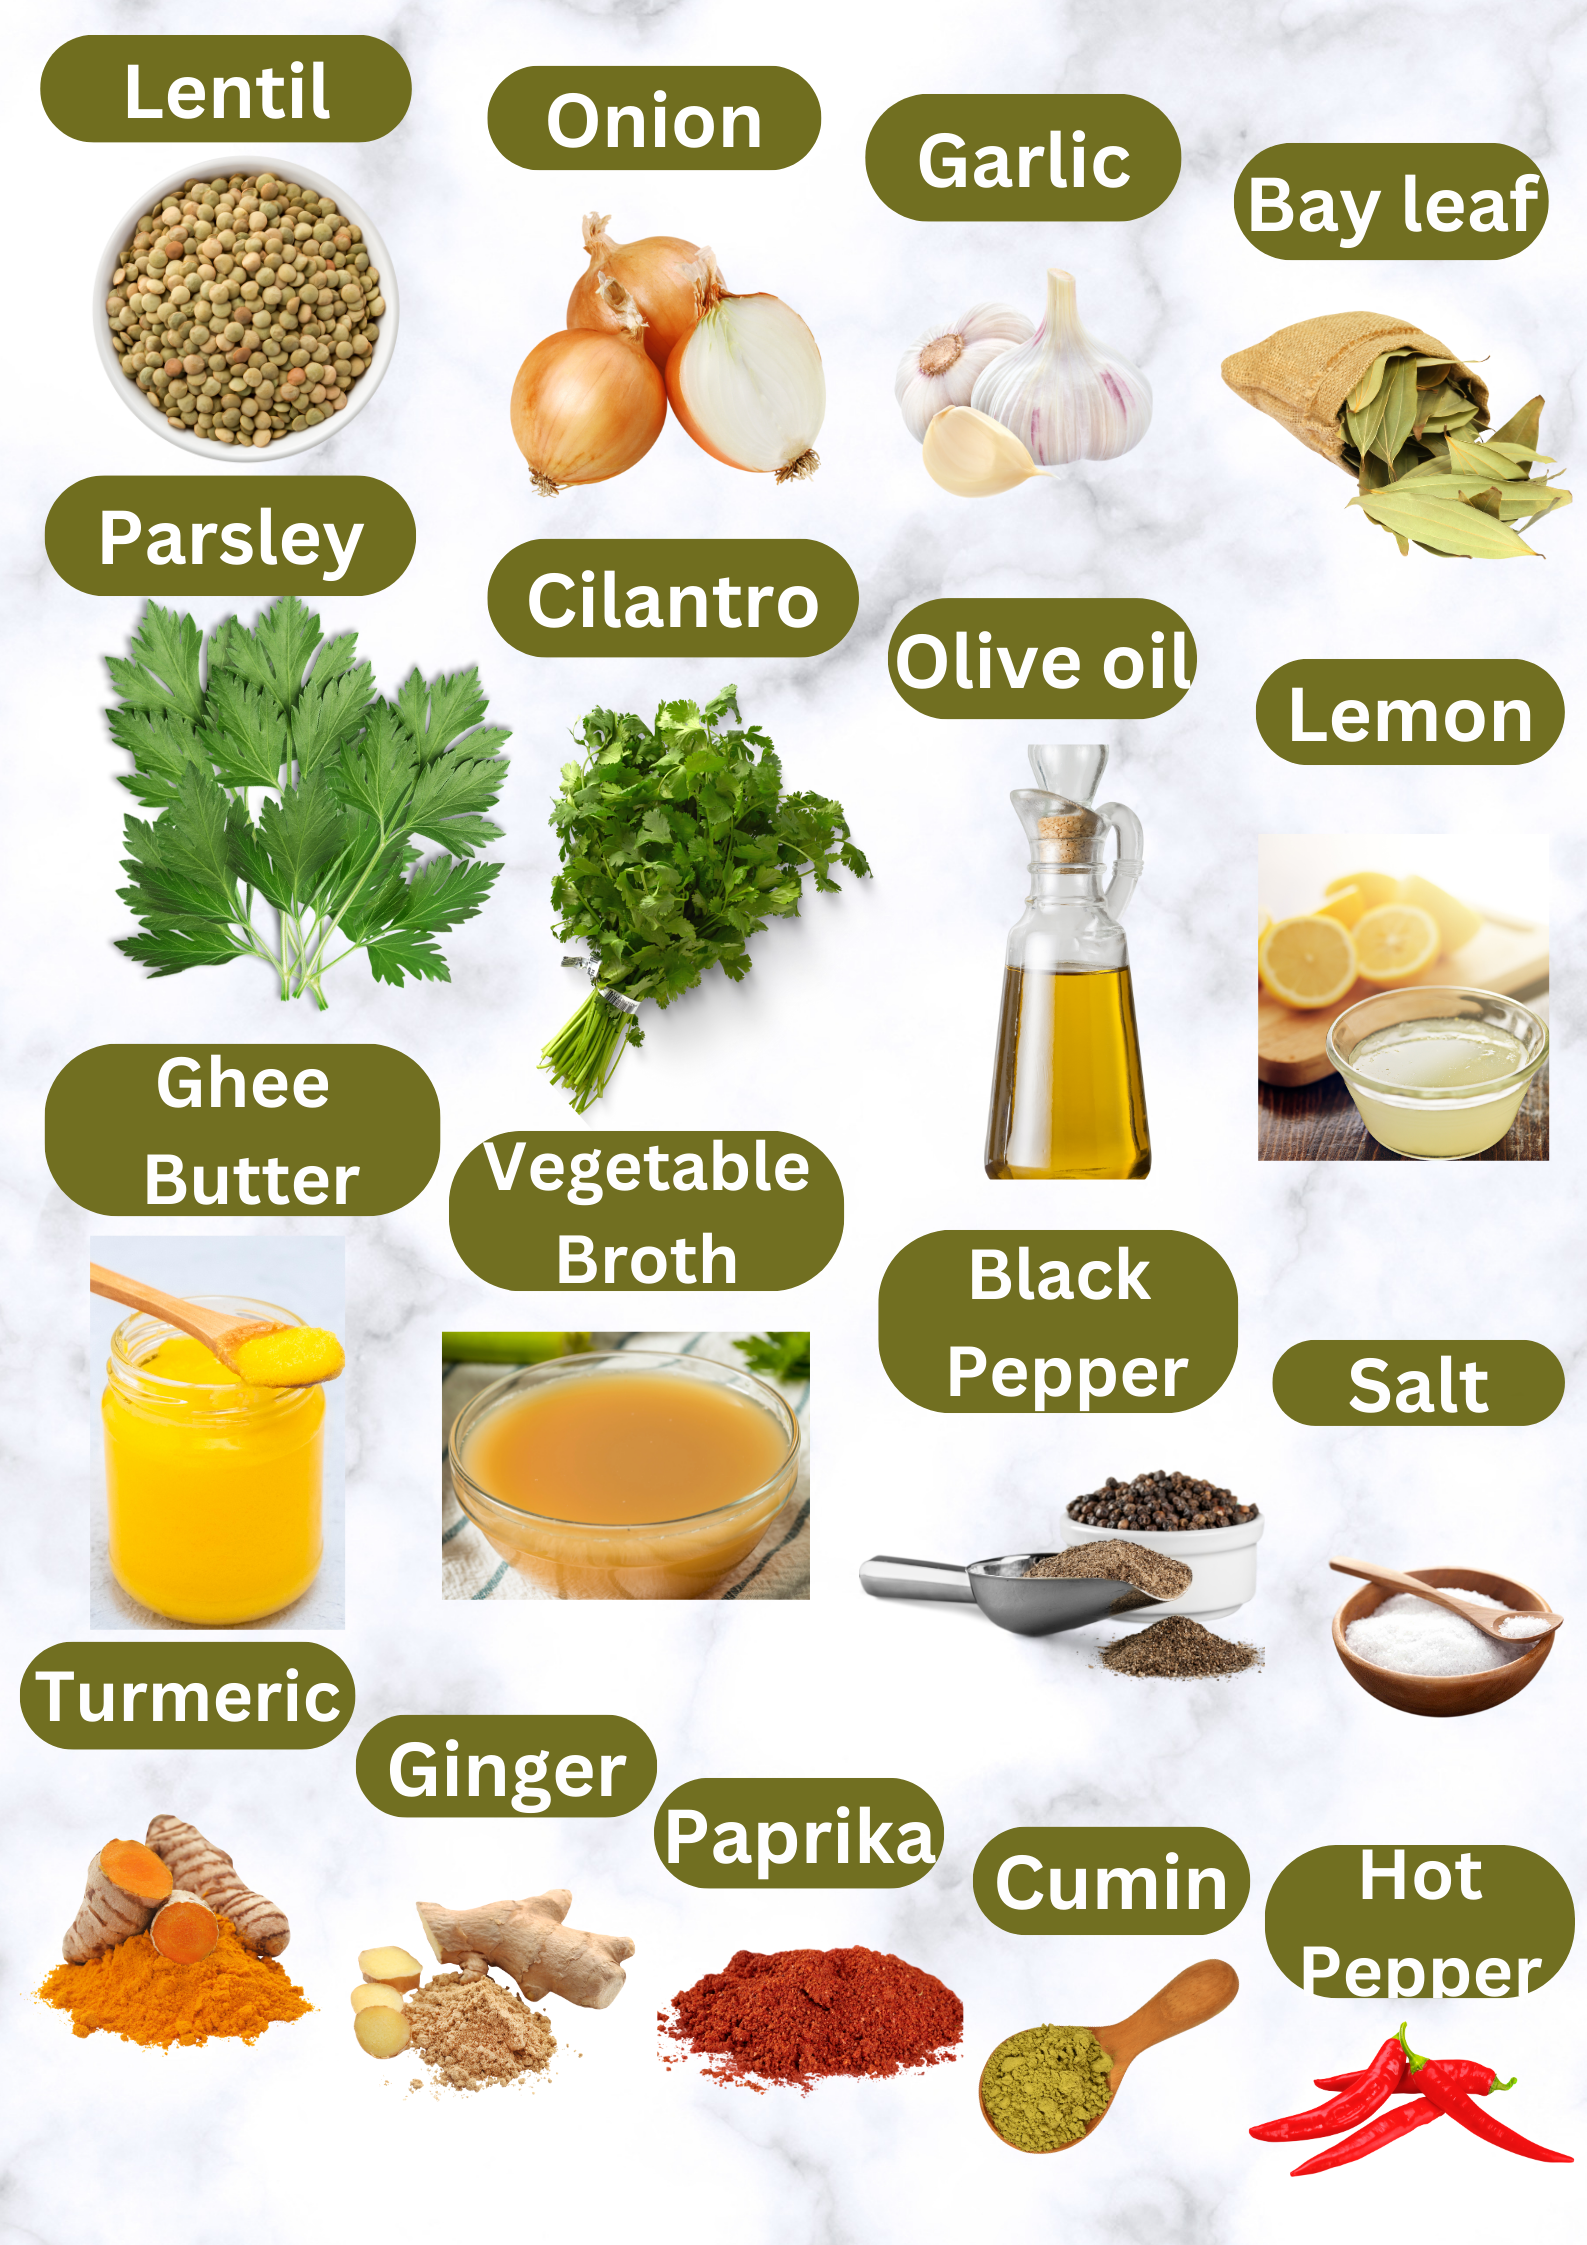
Ingredients You’ll Need
Understanding the role of each ingredient allows you to appreciate how they work together to create delicious and nutritious lentil bread rolls:
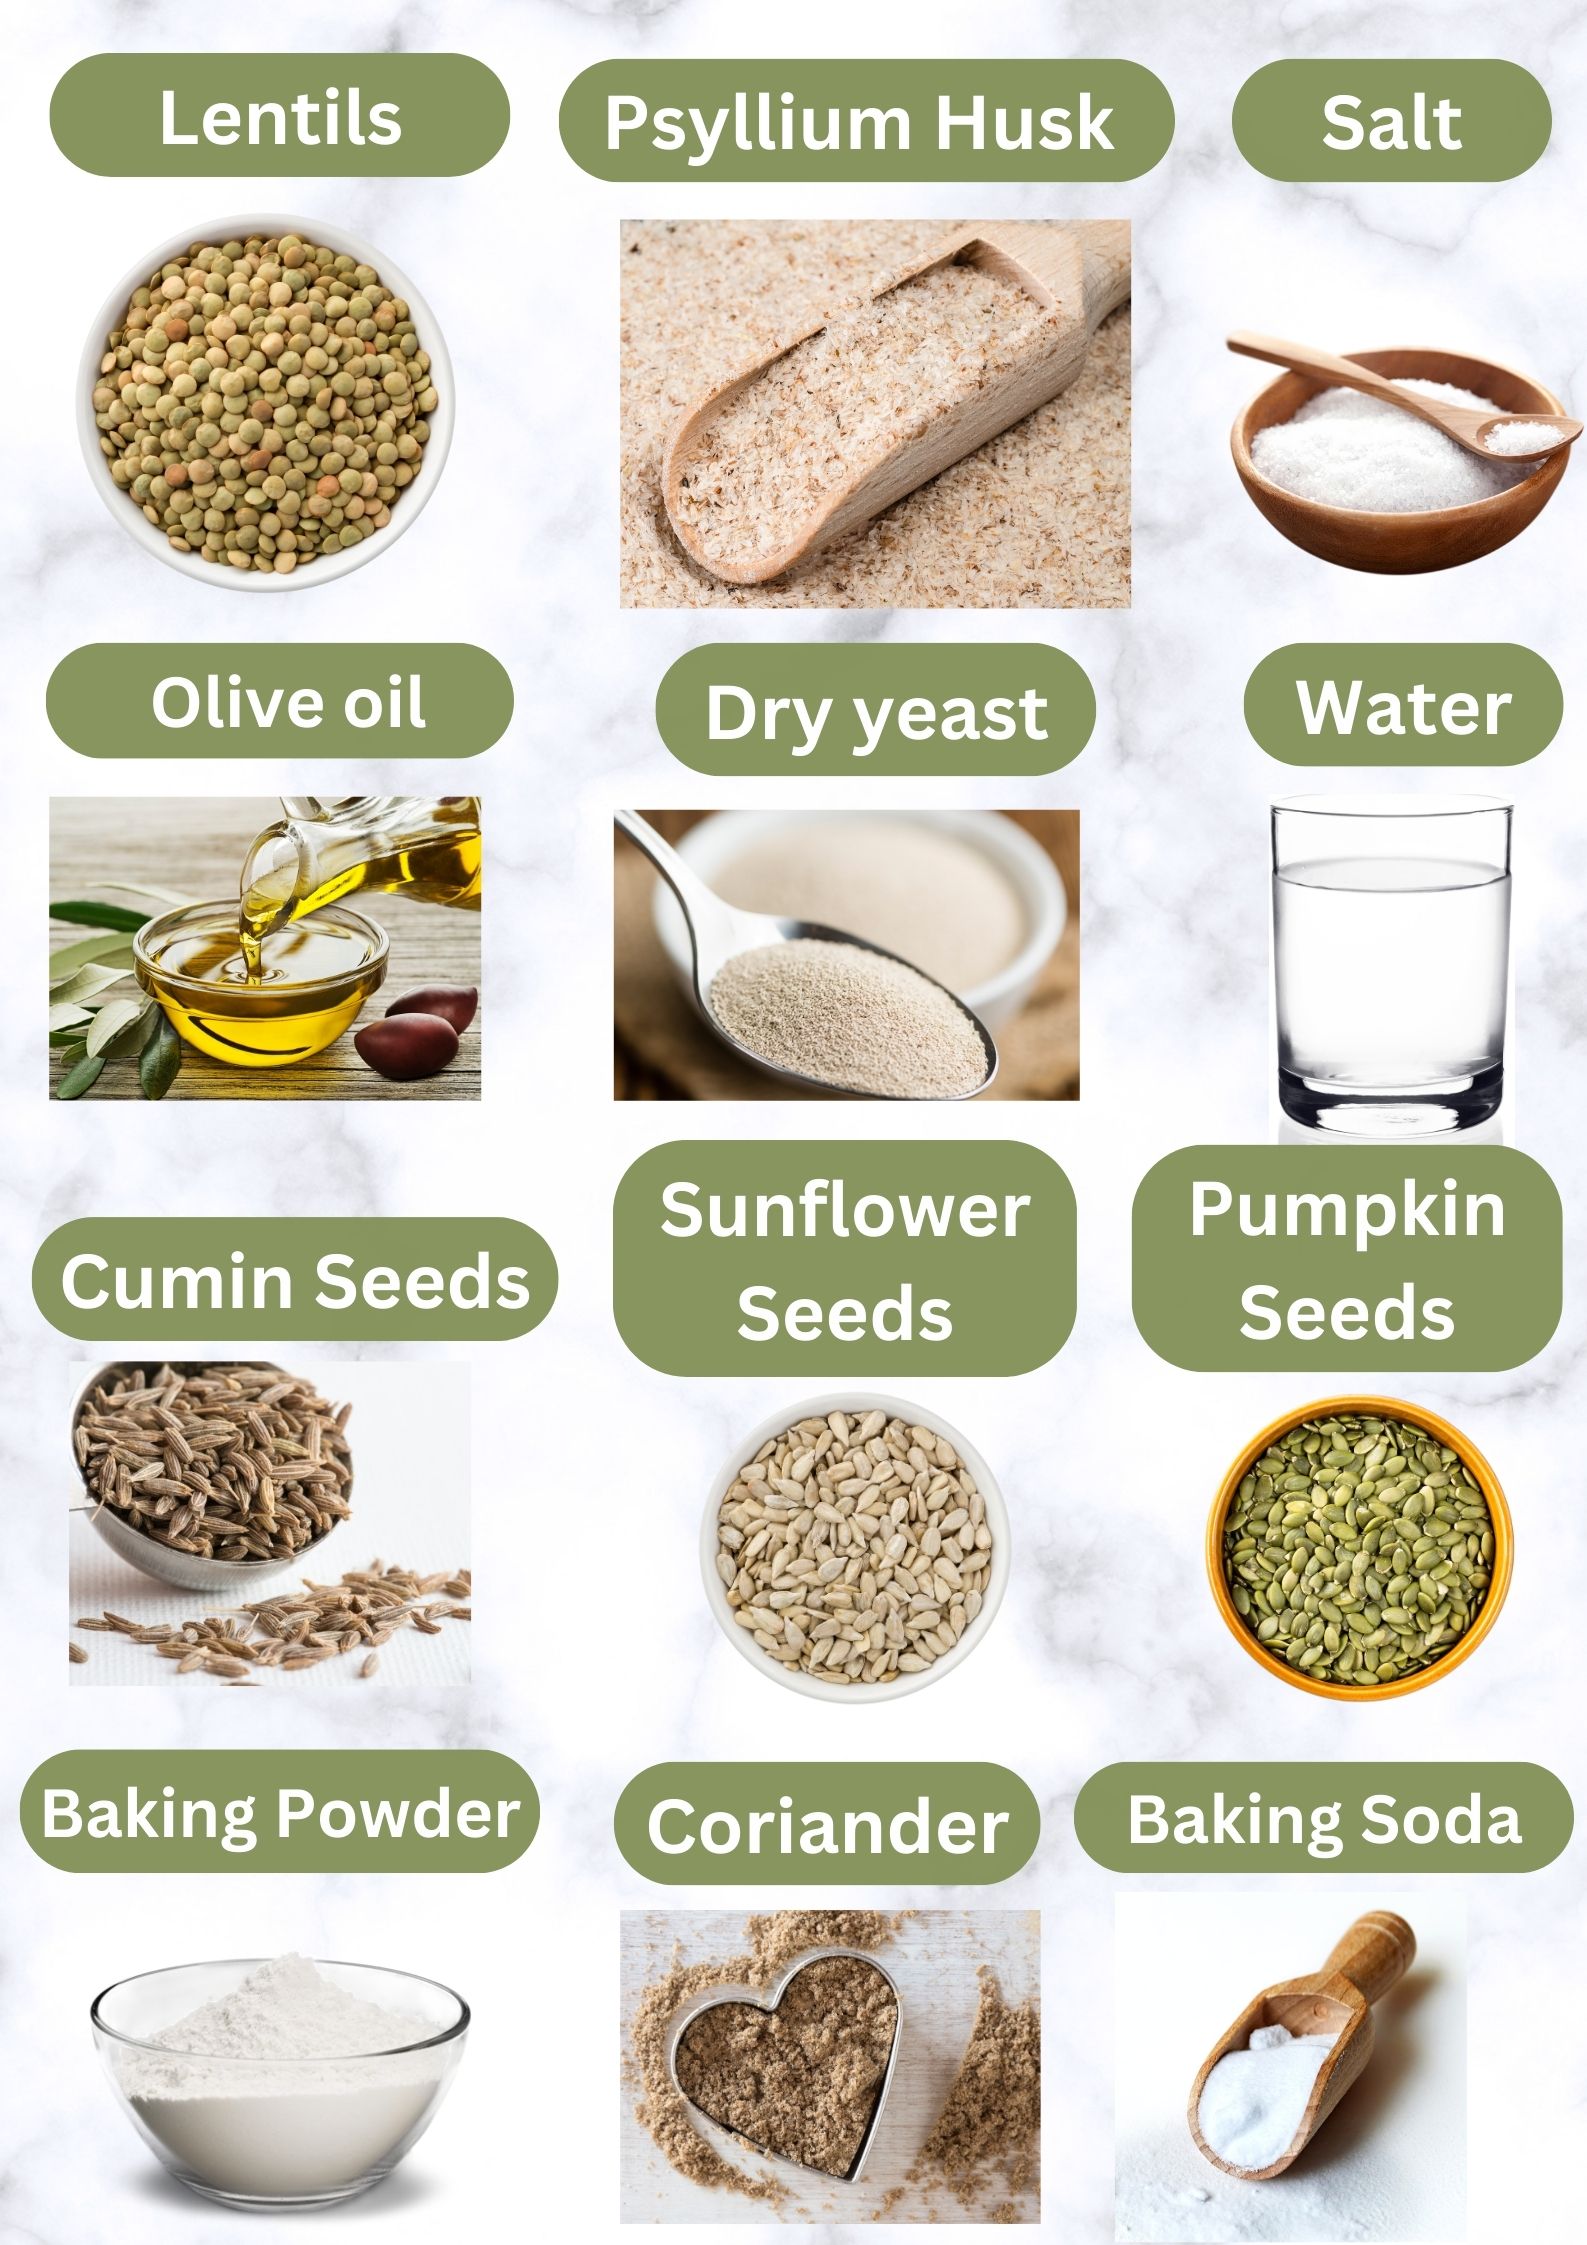
- Psyllium Husk: This ingredient is crucial for gluten-free baking as it acts as a binding agent. It helps to mimic the elasticity and chewiness that gluten would typically provide, giving the bread structure and preventing it from becoming crumbly.
- Cumin seeds: While optional, cumin seeds play a significant role in flavor enhancement. They add an earthy, warm taste that complements the earthiness of the lentils, creating a more complex and satisfying flavor experience in each bite.
- Baking Powder and Baking Soda: Both of these leavening agents are important for creating the right texture in your bread. Baking soda needs an acid to activate, while baking powder contains its own acid. Together, they help the bread rise, resulting in a lighter and airier final product.
- Dry Yeast: Yeast is vital for fermentation, which not only imparts flavor but also contributes to the bread’s overall rise. While this recipe uses a combination of baking powder and baking soda for quicker results, the yeast adds depth to the flavor profile.
- Olive Oil: This ingredient not only enriches the dough but also enhances moisture and softness in the finished bread. Olive oil adds healthy fats, improving the overall nutritional value and contributing to a delightful texture.
Step-by-Step Recipe for Gluten-Free Lentil Bread Rolls
Follow these easy steps to create the ultimate gluten-free lentil bread:
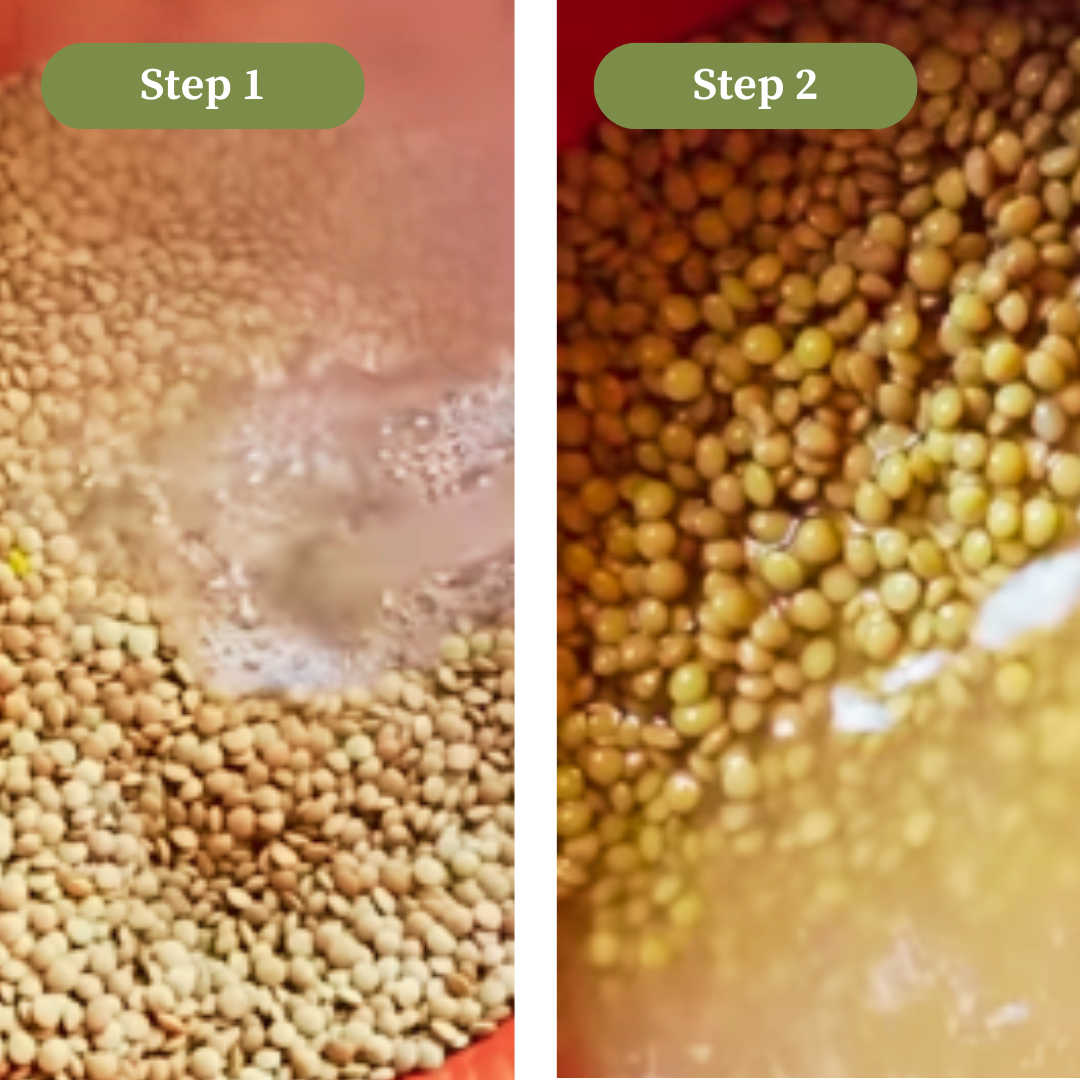
1. Prep the Lentils
- Soak the lentils overnight or for at least 8 hours. Use two cups of water, making sure the water level is about 1/3 above the lentils.
- Wash the lentils thoroughly until the water runs clear.
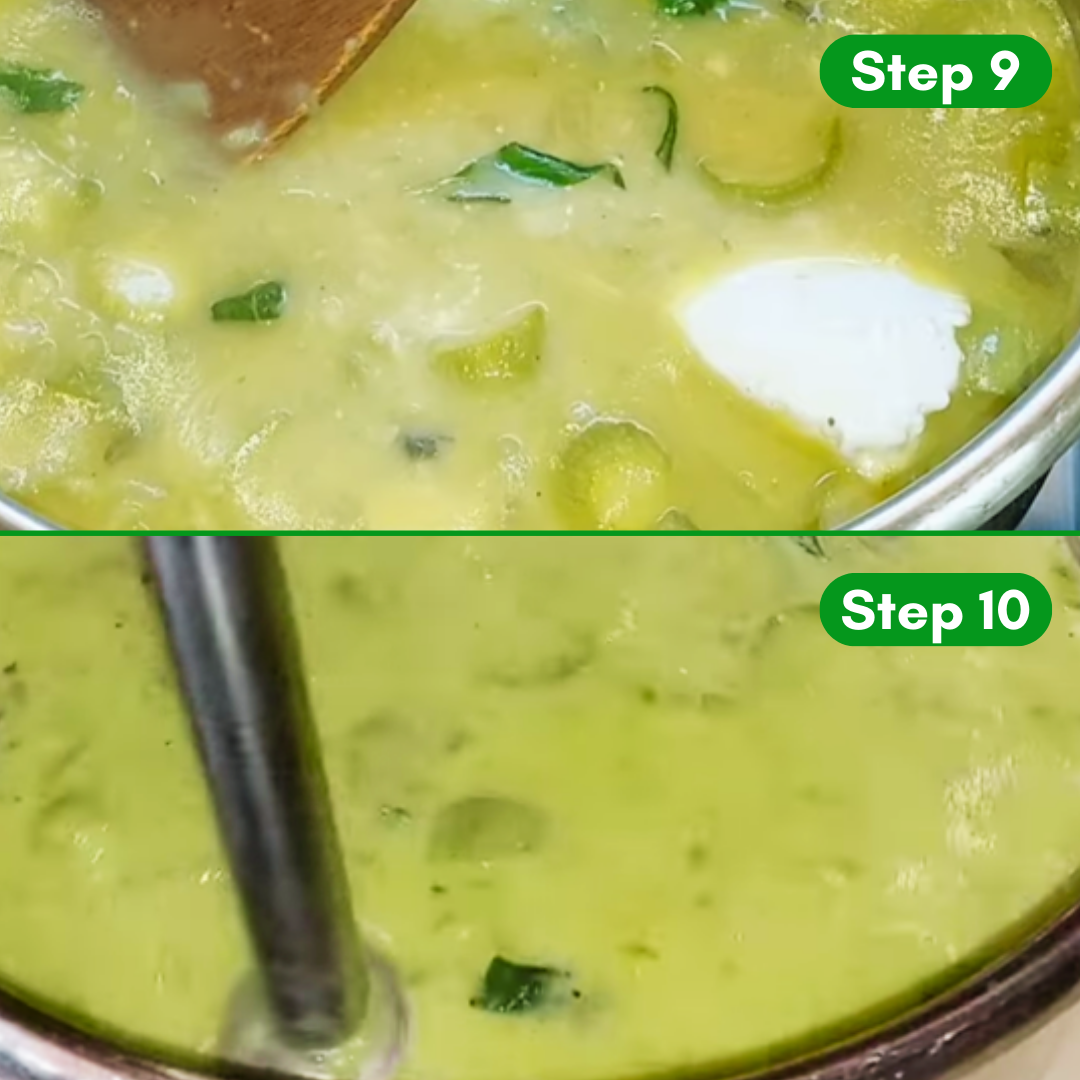
2. Blend the Ingredients
- Using an emulsifier blender or food processor, pulse the lentils until about 80% are processed.
- Add the olive oil and continue to blend.
- Incorporate all the other ingredients and blend until smooth.
3. Prepare for Baking
- Set aside the mixture for 5 minutes.
- Preheat your oven to 350°F (175°C).
- Line a baking sheet with parchment paper.
4. Form the Dough
- Add some olive oil to a spoon and your hands to prevent the dough from sticking.
- Form the dough into balls of your desired size and place them on the baking sheet.
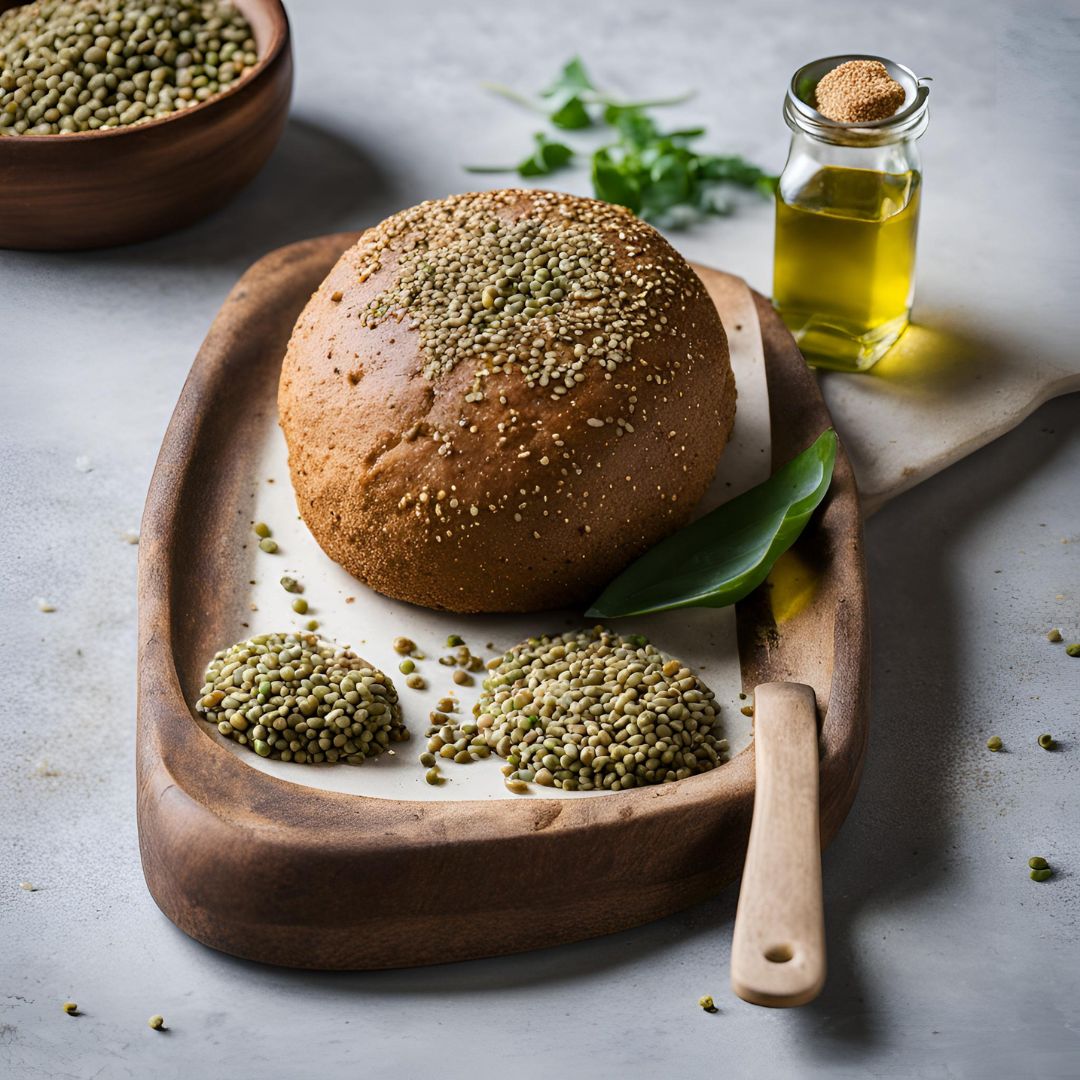
- Sprinkle your preferred toppings (pumpkin seeds, sunflower seeds, or cumin seeds) on top of each roll.
5. Bake
- Bake in the preheated oven for 45-50 minutes, keeping an eye on them as baking times can vary depending on your oven.

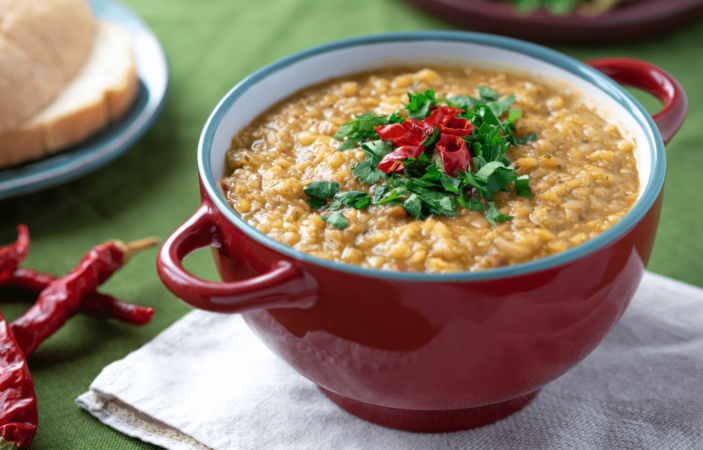
Enjoy Your Homemade Lentil Bread Rolls!
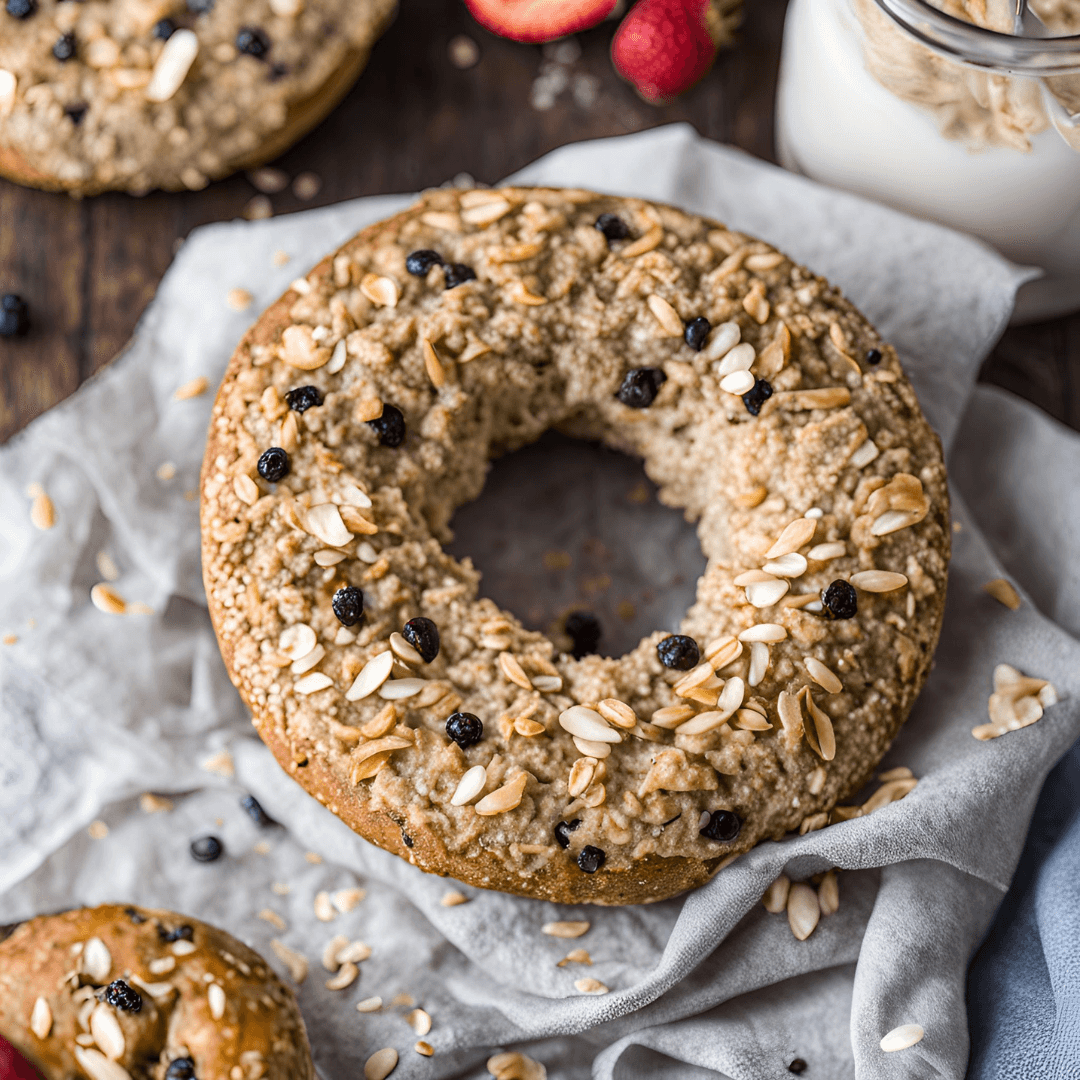
Once baked, allow the bread rolls to cool slightly before serving. These gluten-free lentil bread rolls are perfect on their own or as a base for sandwiches. Also, try my gluten-free Oatmeal bread.
Health Benefits of Lentils
Lentils are a powerhouse of nutrition. They are:
- High in Protein: Great for vegetarians and vegans.
- Rich in Fiber: Promotes digestive health.
- Packed with Vitamins and Minerals: Including iron, folate, and magnesium.
Pro Tips for Baking Lentil Bread
- Choose the Right Lentils: While green lentils work well, experimenting with red or brown lentils can offer different textures and flavors. Just ensure they are cooked and blended properly.
- Adjust Consistency: If your dough seems too thick, add a little warmer water to reach your desired consistency. Conversely, if it’s too thin, incorporate a bit more psyllium husk to help bind the mix.
- Store Properly: After baking, store leftover bread rolls in an airtight container at room temperature for up to three days. For longer storage, freeze them and reheat as needed.
- Ensure Proper Blending: Blending the lentils well ensures a smoother dough.
- Monitor Baking Time: Since oven temperatures can vary, start checking your rolls at the 40-minute mark.
- Experiment with Flavors: Feel free to add herbs or spices to the dough for added flavor.
Frequently Asked Questions about Lentil Bread
- Can I use canned lentils instead of dry?
Yes, you can use canned lentils for convenience. Just be sure to rinse and drain them thoroughly before blending to avoid excess moisture.
- How can I enhance the flavor of the bread?
You can add herbs, garlic powder, or even cheese to the dough before baking. Experiment with different spices to create unique flavor profiles!
- Is lentil bread suitable for a ketogenic diet?
While lentils are nutritious, they are also higher in carbohydrates than some other gluten-free alternatives. If you’re following a strict ketogenic diet, check your portion sizes.
- What can I use as a substitute for psyllium husk?
Chia seeds, flaxseed meal, or a combination of both can work as substitutes. However, note that they may alter the texture slightly.
- Can I make this recipe vegan?
Absolutely! This lentil bread recipe is naturally vegan, as it does not include any animal products. Enjoy the health benefits without worry!
Conclusion
Gluten-free baking doesn’t have to be complicated or boring. With our ultimate healthy lentil bread rolls, you get a delicious, nutritious, and easy-to-make alternative to traditional bread. Ready to give it a try? Start baking and join our community of gluten-free enthusiasts today!
Looking for healthier, gluten-free recipes? Subscribe to our newsletter for regular updates and exclusive recipes.
Feel free to add any personal touches, comments, or questions in the comments section below. Happy baking!


How to make the best vegan GF Lentil Bread Roll
Description
Delight in the wholesome goodness of homemade gluten-free lentil bread rolls! Packed with protein, fiber, and essential nutrients, these versatile rolls are perfect for sandwiches or enjoyed on their own. Making every bite a healthy treat!
Ingredients
Instructions
- Soak the lentils overnight or for at least 8 hours. Use two cups of water, making sure the water level is about 1/3 above the lentils.
- Wash the lentils thoroughly until the water runs clear.
- Using an emulsifier blender or food processor, pulse the lentils until about 80% are processed.
- Add the olive oil and continue to blend.
- Incorporate all the other ingredients and blend until smooth.
- Set aside the mixture for 5 minutes.
- Preheat your oven to 350°F (175°C). Line a baking sheet with parchment paper.
- Add some olive oil to a spoon and your hands to prevent the dough from sticking.
- Form the dough into balls of your desired size and place them on the baking sheet.
- Sprinkle your preferred toppings (pumpkin seeds, sunflower seeds, or cumin seeds) on top of each roll.
- Bake in the preheated oven for 45-50 minutes, keeping an eye on them as baking times can vary depending on your oven.