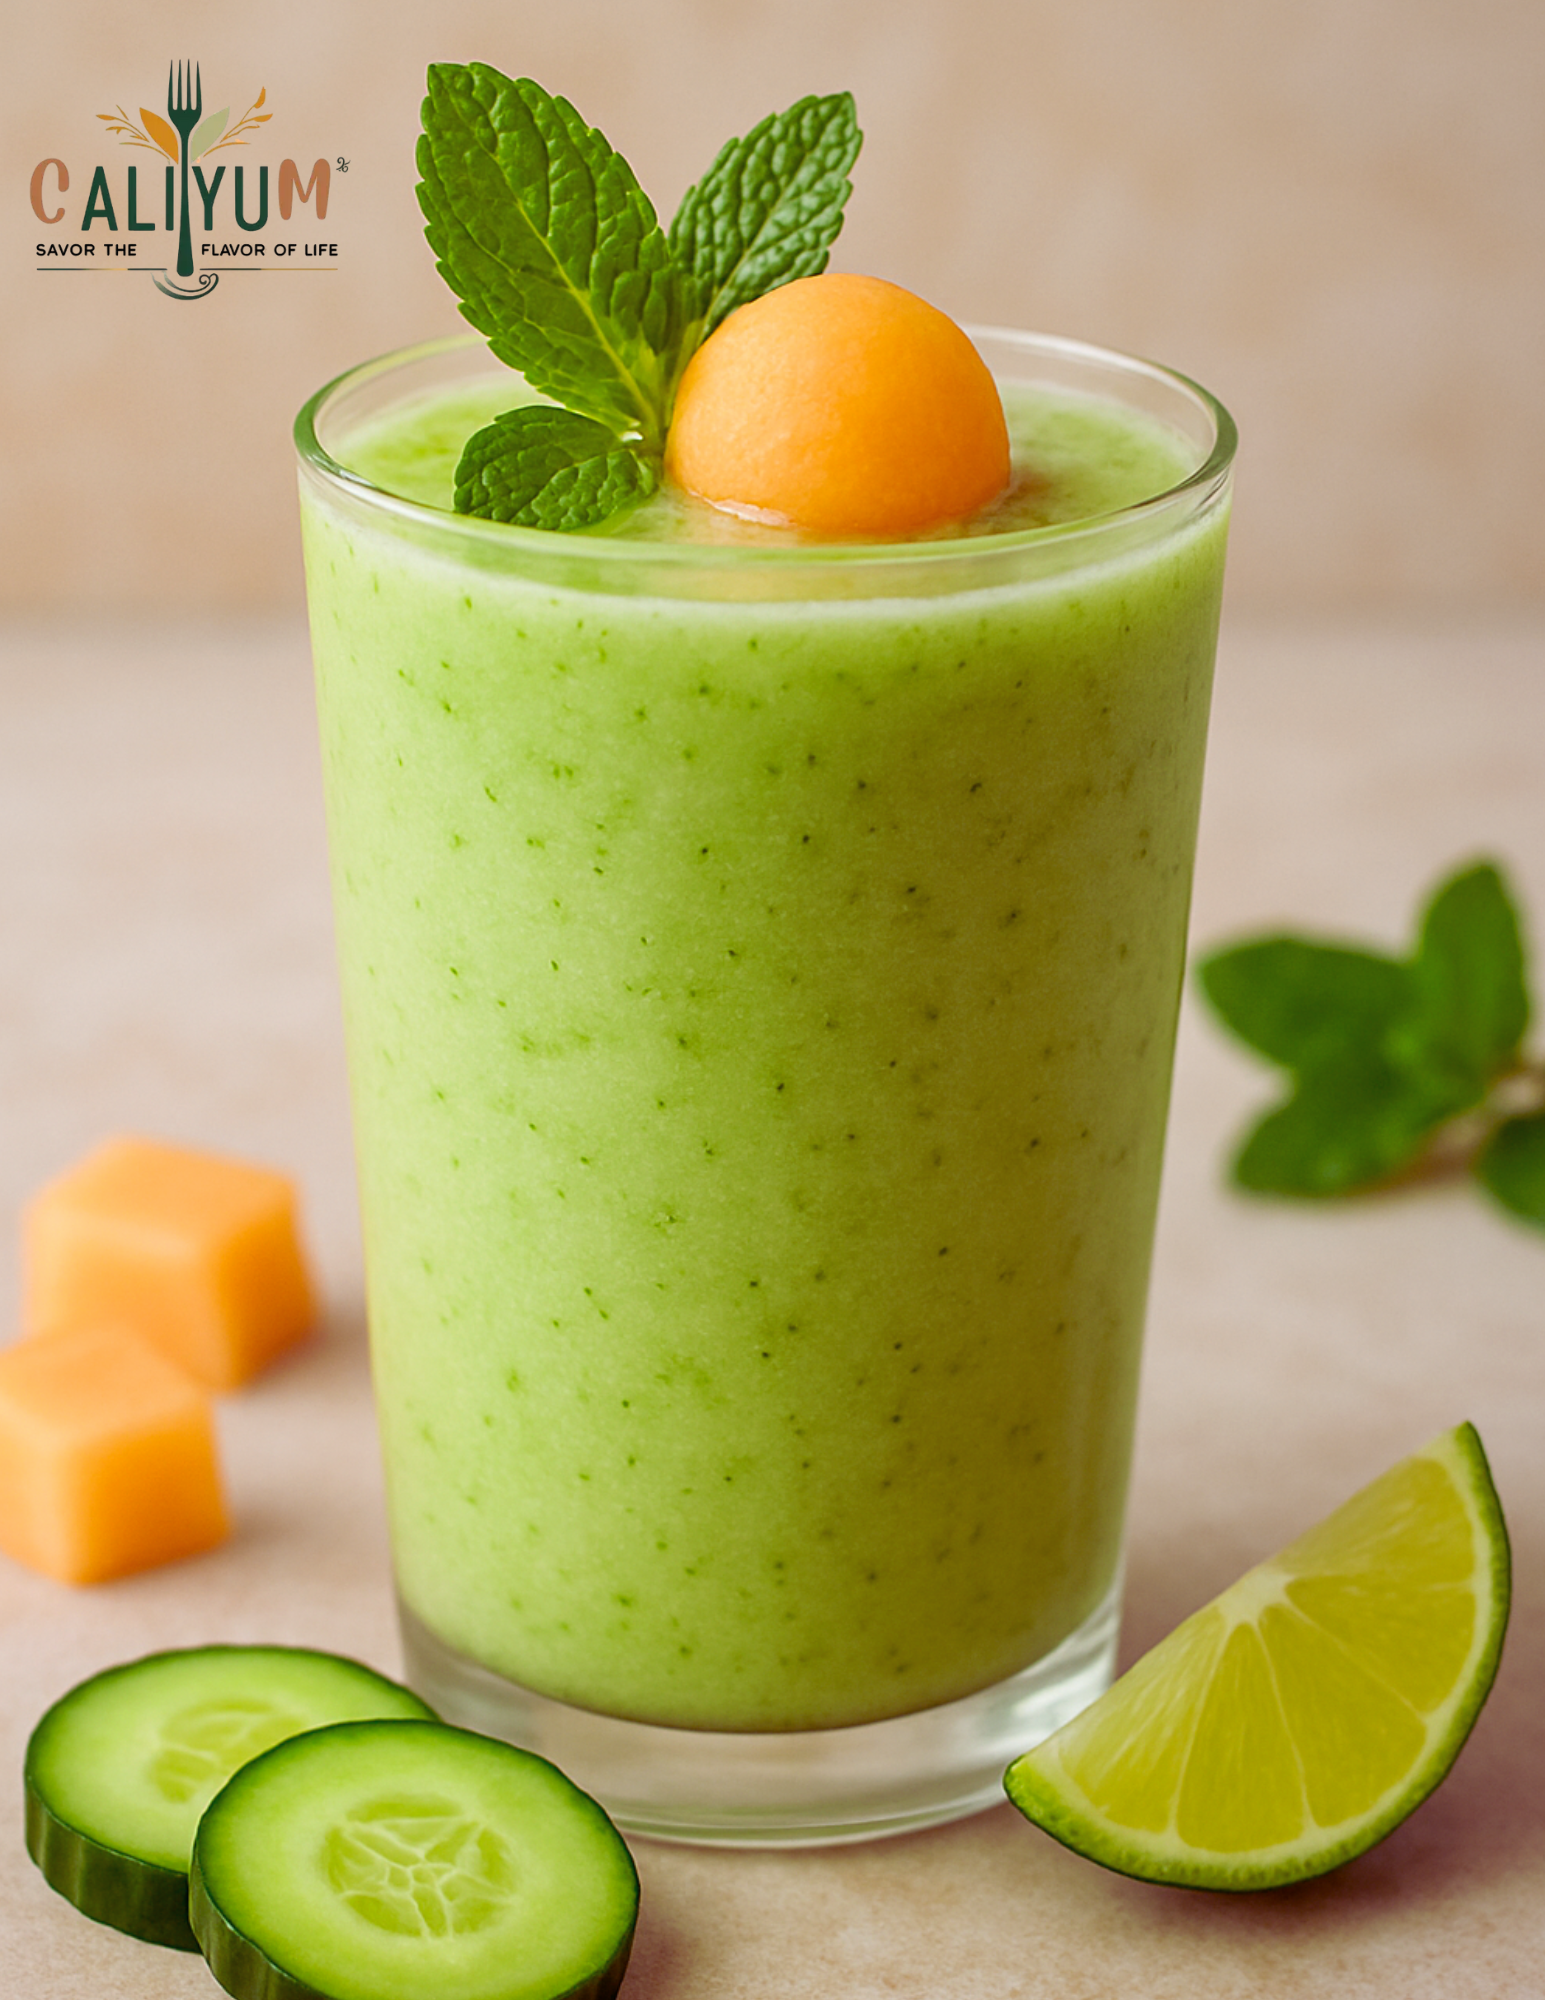
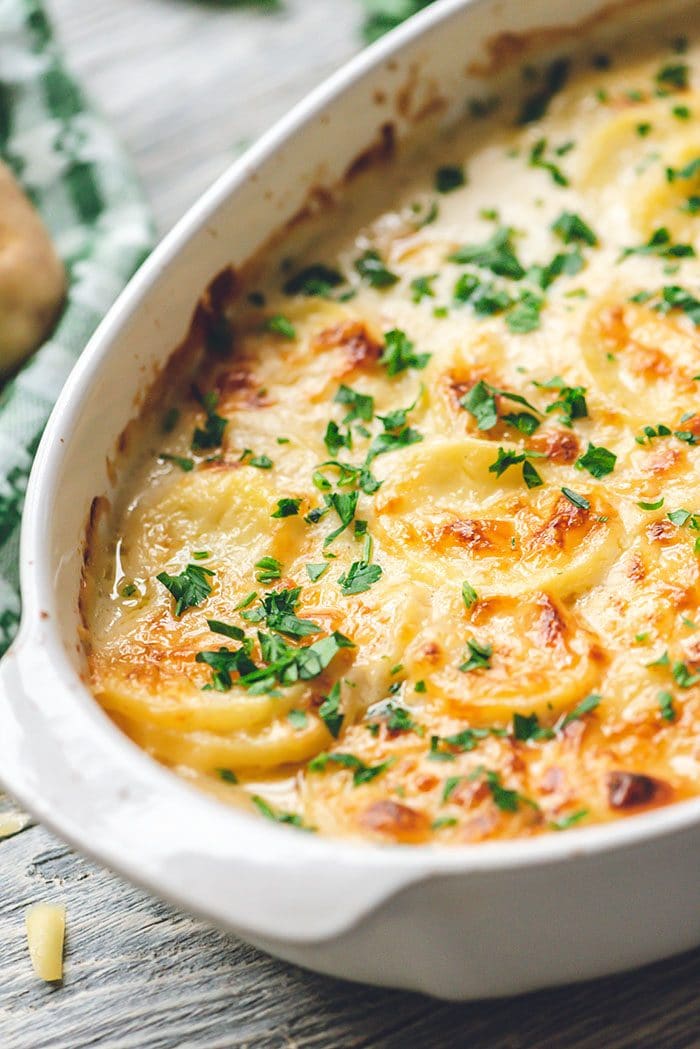
Grilled Cheese & Tomato Soup—The Perfect Combination of Comfort & Taste

A bowl of tomato soup inspired by gluten-free dishes

Grilled cheese and tomato soup, even as separate dishes, make a tasty meal, but when combined, they reach a whole new level of deliciousness.

Who doesn’t look for comfort food to unwind a hectic day? If you’re in the same boat, we’ve got something special for you!

The excellent combination of cheese between two slices of bread, grilled to perfection and dipped in a hot bowl of rich tomato soup, hits different, especially when you’re craving it.

Want to know what it takes to make this ultimate comfort food? We’ve listed down all the ingredients you’ll need to make a homemade soup with the easiest method.

However, you need to ensure that you have the right bread and cheese because it’s going to make a whole lot of difference. Similarly, farm-picked fresh tomatoes will give a rich and creamy texture to your soup in addition to lots of flavors as compared to canned tomatoes or tomato puree.

Ingredients for Grilled Cheese & Tomato Soup

  • 28 oz. whole tomatoes (organic)
  • 2 celeries
  • 1 onion
  • 2 carrots
  • 3 garlic cloves
  • 36 oz. of chicken broth
  • 1/3 cup of parmesan cheese
  • Salt as required
  • Pepper according to taste
  • Fresh bread
  • 1 Tbsp butter (unsalted)
  • Gouda cheese
  • 1 Tsp sugar
  • 1 Tsp olive oil

How to Grill Cheese

There are many ways you can make grilled cheese, but if you’re going to ask me, I’d definitely recommend using fresh white bread along with creamy gouda cheese because nothing beats this combination.

Following are the steps to make the perfect grilled cheese:

Grate Gouda Cheese

Initially, you’ll need to think which cheese is available to you right away or which one you like eating the most; since it’s comfort food, it should be all about your likes and preferences.

Keep in mind to shop for the one that’s full of flavor and extra creamy so that it literally melts in your mouth.

However, in this recipe, we’re going to learn how to make grilled cheese with Gouda. It’s always in high demand and my personal favorite as well because it melts right away. In case it’s not available at your local market, you can also use cheddar cheese.

Use the thick grating side, so you have bigger pieces of cheese as they melt more easily.

A block of cheese kept on a wooden board along with bread

Put Butter on the Bread

Like the cheese, the bread you use for grilled cheese impacts the taste of the entire soup. If you want to make the ideal grill cheese, go for a nicely cut, thick slice of milky white bread.

Spread the unsalted butter generously on each slice of the bread, covering each side evenly. It’s up to you if you want to use salted butter, but the reason why I prefer using unsalted butter is that the cheese itself is salty enough.

Add Cheese

Preheat your pan on low heat, and once it’s hot enough, you can keep one slice of bread in a way that the butter side should face downwards at the pan.

Keep in mind not to heat your pan too much because it won’t allow enough time for the cheese to melt and will instead start burning.

Generously add cheese on top of the bread.

Leave it to Grill

Keep the other slice of the bread above the cheese, but this time, the butter side must face upward.

With the help of a spatula, lift the grilled cheese bread to check if it has turned golden; if yes, then turn it around to grill it all the way.

Leave it for a minute to grill, so the cheese inside melts completely. Once both sides are perfectly golden, it’s ready to serve or eat!

Fresh tomatoes kept in a basket for Zaalouk salad recipe 

Directions for the Tomato Soup

Once you nail the grilled cheese, you need to cook the soup to perfection as well because they go hand in hand.

To make the tomato soup rich and creamy, follow the directions given below:

Prepare the Vegetables

The first step to preparing any soup or broth is to collect all the required vegetables. For tomato soup, we’ll need to cut carrots, onions, celery, and garlic. Along with chopped parmesan.

Sauté Vegetables

Once your vegetables are minced, diced, chopped, put them together in a pot with medium-low heat but before that, heat 1 Tbsp of olive oil, so the vegetables are sauteed instantly.

A bowl of tomato soup inspired by gluten-free dishes 

Add Tomatoes

After the vegetables turn soft, add your tomatoes and chicken broth, along with a pinch of sugar, pepper, and salt.

Sprinkle some chopped parmesan cheese and mix everything.

Leave it to Simmer

After you’re done adding all the ingredients, leave the soup to simmer for at least half an hour.

If you like your soup crunchy and with thick pieces of vegetables in your mouth, then you may drink it as it, but if you prefer a smooth texture, then blend it till it becomes like a creamy paste.

In search of a healthy food blog? Check out Cali Yum for delicious yet healthy food! We have a wide range of gluten-free recipes such as gluten-free Moroccan recipes, gluten-free potato tuna pie recipes, gluten-free Mediterranean recipes, and so many more options!

So, what are you waiting for? Get your hands on these tasty yet easy-to-make savory and sweet recipes packed with flavors of different cuisines.

Contact us now and get your cravings fulfilled with our healthy food recipes.

Cabbage Salad

A simple and easy cabbage salad to make.

This warm cabbage salad is a healthy plant based dinner sidee or can be main! A spicy, crunchy and flavorful inspired cabbage salad to enjoy at any meal or with bread. Pot luck, paleo, vegan friendly and easy to make.

I never liked cabbage before due to the stingent smell of it especially when steamed or boiled. Knowing the whopping benefits of eating cabbage i focused my attention in exploring more recipes and healthy ways to incorporated into my diet.

Did you know that cabbage is considered a cancer killer cruciferous vegetable? No i didn’t but you might’ve.

Good to know the benefits

  • Reduces inflammation
  • Regulate blood sugar
  • Promote weight loss
  • Contain cancer-fighting compounds
  • Helps with estrogen balance and
  • Enhances heart health

So, few months ago i got home while starving and tired to go shopping or even order something to go. I checked my refrigerator for a quick fix meal and found not much with the exception of few items.

Yay!! I found cabbage, onions, garlic, cilantro and lemons. That’s should be a good start!! But wait, how am i going to cook this cabbage?

Being gluten free i make different satisfying and moroccan inspired salads. Instantly i thought to expirement with cabbage instead, let’s make cabbage salad or zaalouk similar to eggplant or zucchini.

What you need….

  • half cabbage head
  • 8 garlic cloves
  • olive oil
  • cilantro
  • parsley
  • lemon
  • cumin
  • paprika
  • cayenne pepper
  • hot sauce
  • one frying pan
  • one regular pot to boil and cook cabbage
  • strainer
  • spatula

Ingredients

  • Half cabbage head
  • 4 Tbsp. olive oil
  • 4 Tbsp. cilantro
  • 2 Tbsp. parsley
  • 1/2 Tsp. cumin
  • 1/2 Tsp. paprika
  • 1/8 Tsp. cayenne pepper
  • 4 drops of hot sauce
  • 8 garlic cloves
  • 1/2 Tsp. of salt
  • A juice of half lemon

How to make cabbage salad

  1. Slice thin half of the cabbage
  2. Add two cups of water and salt to a pot
  3. Transfer the thin sliced cabbage to the pot alongside with two garlic cloves
  4. Boil for 20 mins or until cabbage is a bit tender
  5. In a frying pan over medium heat add olive oil and transfer strained cabbage and sautee for five minutes
  6. Add minced garlic and sautee for another five minutes
  7. Add cilantro, parsley, spices and lemon juice
  8. Stir all and turn off the heat and set aside to cool down
  9. Serve as a side or main

I promise you that as soon as you take the first bite of this delicious, addictive salad you will never stop making it.

How to make a delicious Lentil Soup

“Indulge in the ultimate comfort with our irresistibly delicious lentil soup! Packed with hearty flavors and wholesome ingredients, this nourishing dish is sure to warm your soul and leave you craving more.”

Upgrade your Lentil Soup game with our irresistible recipe! Say goodbye to blandness and hello to a dish that’ll have everyone clamoring for seconds… and thirds! Whether you choose green, red, brown lentils, or a mix, this nourishing yet simple recipe guarantees 100% deliciousness.

What is Lentil Soup?

Lentil soup is a hearty and nutritious soup made primarily from lentils, which are small legumes known for their high protein and fiber content. Lentil soup is popular worldwide and is valued for its delicious taste, affordability, and health benefits.

Infused with just the right blend of spices, bay leaves, and a hint of lemon, our Lentil Soup transcends the ordinary. It’s an effortless creation that consistently wows, earning rave reviews and five-star ratings from satisfied readers! For more delicious soups, try my Broccoli soup and Celery soup.nd health benefits.

Now, let’s talk about Lentil Soup. Sure, it might not sound like the most exciting option out there, but trust us, this soup is a game-changer! Even for those of us who usually crave bold flavors, this dish is impossible to resist. Prepare to find yourself reaching for seconds, thirds, and even packing leftovers for tomorrow’s lunch—it’s that good.

And let’s not forget the health benefits! Lentils are a powerhouse of nutrition—packed with minerals, protein, and fiber while being low in fat and calories. Plus, their slow-burning carbs keep you feeling satisfied for longer, making them a win-win for your taste buds and your health.

So, what’s the secret to our Lentil Soup’s undeniable deliciousness?

It’s all about the little touches. From the slow-cooked onions, garlic, spices, and herbs that create a flavor base like no other to the surprising twist of fresh lemon juice.

What you will need to make Lentil Soup


Pro Tips for Perfecting Your Lentil Soup

  1. Choose the Right Lentils: Different types of lentils offer varying textures and flavors. Opt for green or brown lentils for a firmer texture, while red lentils tend to break down more, creating a smoother consistency. Experiment with different varieties to find your favorite!

  2. Pre-Soak for Even Cooking: If using whole lentils, consider soaking them for a few hours or overnight before cooking. This can help reduce cooking time and ensure more even cooking, resulting in a creamy and well-developed soup.

  3. Layer Flavors: Build depth of flavor by sautéing aromatic vegetables like onions, garlic,  in butter before adding the lentils and liquid. This step caramelizes the vegetables, enhancing their natural sweetness and adding complexity to the soup.

  4. Balance with Acid: A splash of acid, such as lemon juice or vinegar, can brighten the flavors of lentil soup and add a refreshing contrast. Add it towards the end of cooking to prevent the lentils from becoming too acidic.

  5. Texture Matters: For a thicker soup, blend a portion of the cooked lentils with an immersion blender before serving. Alternatively, mash some of the lentils against the side of the pot with a spoon for a chunkier texture. Adjust the consistency to your preference by adding more broth or water as needed.

  6. Finish with Freshness: Just before serving, stir in fresh herbs like parsley, cilantro, or dill to add brightness and freshness to the soup. A drizzle of olive oil can also provide a luxurious finishing touch.

  7. Experiment with Toppings: Get creative with toppings to add texture and flavor to your lentil soup. Try crunchy croutons, a sprinkle of grated cheese, a swirl of pesto, or a spoonful of creamy coconut milk for a dairy-free option.

  8. Meal Prep and Freeze: Lentil soup makes for excellent meal prep and freezer-friendly meals. Double or triple the recipe to have extra portions on hand for busy days. Store leftovers in airtight containers in the fridge for up to 4 days or freeze for longer storage.

    How to make Lentil Soup

    Step 1- Remove all debris or small stones from the dried lentils, the organic lentils come cleaner with less stones than the regular non-organic. Add the lentils to a bowl, pour boiling hot water to cover 2/3 above the lentils and leave it soaking for at least two hours, four hours is ideal.

    Step 2- With your hand rub the lentils in the same water and flip them over until all the foam raise up to the top. Transfer the lentils to a strainer and wash three to four times under running water until the water comes out clean. This step is important to reduce the bloating associated with legumes and beans.

Frequently Asked Questions

How long does lentil soup last in the refrigerator?

Lentil soup can typically be stored in the refrigerator for up to 4 to 5 days in an airtight container.

Can I freeze lentil soup?

Yes, lentil soup freezes well. Store it in freezer-safe containers or bags for up to 3 months. Thaw overnight in the refrigerator before reheating.

Are lentils gluten-free?

Yes, lentils are naturally gluten-free, making lentil soup a suitable option for those with gluten sensitivities or celiac disease.

How do I thicken lentil soup?

Lentil soup naturally thickens as it cooks due to the starch released from the lentils. However, if you prefer a thicker consistency, you can blend a portion of the soup with an immersion blender or mash some of the lentils with a spoon.

Can I use different types of lentils in lentil soup?

Yes, you can use various types of lentils in lentil soup, such as green, brown, red, or French lentils. Each type offers a slightly different texture and flavor, so feel free to experiment to find your favorite.

How do I prevent lentil soup from becoming mushy?

To prevent lentil soup from becoming mushy, avoid overcooking the lentils. Cook them just until they are tender but still hold their shape. Additionally, refrain from stirring the soup too vigorously, as this can cause the lentils to break down further.

Can I make lentil soup in a slow cooker or Instant Pot?

Yes, lentil soup can be made in a slow cooker or Instant Pot for added convenience. Follow the manufacturer’s instructions for cooking times and settings.

Is lentil soup vegetarian/vegan-friendly?

Yes, lentil soup is naturally vegetarian and can easily be made vegan-friendly by using vegetable broth instead of chicken broth and omitting any dairy-based ingredients.

Are lentils healthy?

Yes, lentils are highly nutritious and packed with protein, fiber, vitamins, and minerals. They are also low in fat and cholesterol, making them a healthy addition to any diet.

Can I customize lentil soup with additional ingredients?

Absolutely! Lentil soup is highly versatile and can be customized with a variety of ingredients such as vegetables, herbs, spices, and proteins like sausage or bacon to suit your taste preferences.

Nutrition Facts

Servings 4


Amount Per Serving
Calories 300kcal

Delicious Vegetarian Lentil Soup

Difficulty:BeginnerPrep time: 15 minutesCook time: 30 minutesRest time: minutesTotal time: 45 minutesServings:4 servingsCalories:300 kcal Best Season:Available

Description

Discover the ultimate comfort food with our hearty lentil soup recipe! Packed with flavor and nutritious ingredients, this satisfying dish is a must-try for food enthusiasts. Dive into a bowl of warmth and goodness today!

Ingredients

Instructions

  1. in a bowl, add lentils and boiling hot water. Set aside for at least four hours, this way the lentils will not fall apart during the cooking process.
  2. In a medium pot, add the lentils and olive oil.
  3. Add the grated onion, garlic, carrot, diced parsley, and cilantro. Stir all ingredients until combined.
  4. Add the water or vegetable broth to cover the lentils. Cook on a low to medium heat for 25 minutes.
  5. Uncover and check if the lentils are cooked.
  6. Add the cumin, 1/4 cup olive oil and the lemon juice. Stir and serve hot.
Keywords:Delicious lentil soup, Vegetarian lentil soup, Amazing lentil soup, Vegetarian soup, Vegan Soup

Nutrition Facts

Serving Size1plate
Servings2
Amount Per Serving
Calories100
Pr% Daily Value *


Amazingly delicious gluten-free chicken tostones

Is it possible to recreate Bahama Breeze Chicken Tostones, Healthier & Gluten-Free? 

When I made the switch to gluten-free, I immediately contacted Bahama Breeze to find out if I could still eat their chicken tostones. Unfortunately, the answer was no, so I set out to create a version of this comfort food that I could enjoy.  

I love all types of ethnic foods; ok wait… we can leave out the ones with insects or strange animals. My foodie comfort level hasn’t allowed me to go there yet. 

For a long time, my husband and I would go to Bahama Breeze specifically for the chicken tostones. It’s sooooooo delicious and a go-to comfort food for me. 

As soon as I discovered my gluten allergy, Bahama Breeze was one of my very first calls. 

“Are the chicken tostones at Bahama Breeze gluten-free?”

“No.” 

Thus ended my regular love affair with this beautiful dish. Or, so I thought.

It took me several months to adapt to my new gluten-free lifestyle and limitations. 

Then one morning, I woke up with increased energy and a passion for rediscovering foods I had loved, had given up, but that I just knew had potential to fit into my new diet. 

Why, after all, should a dish that is primarily plantains and chicken have gluten in it in the first place? 

My inspiration came after finding a bag of gluten-free tostones in our local grocery store. Friends had told me that it was easy to make tostones. Tostones, also called Patacones, are made from sliced green plantains that are fried, smashed, and then refried until crisp and delicious. 

I am skeptical of how easy they are and stick to the store-bought tostones. But, one day I’ll venture out and make these fried golden plantain slices from scratch.

For now, I’m sticking with the easy way. Especially since we love this recipe so much, we make it at least once a week! 

How to make gluten-free chicken tostones

You’ll need the following ingredients: 

  • 3 chicken breasts
  • 10 garlic cloves, peeled
  • ⅓ cup of olive oil
  • A bunch of cilantro
  • A bunch of parsley
  • ½ Tbsp. of cumin
  • ⅛ tsp of coriander 
  • ½ Tbsp. of turmeric 
  • ¼ tsp of pepper
  • Salt to taste
  • Juice of two lemons
  • 2 large red peppers, or a mix of red, green, and yellow
  • 1 large package of mushrooms
  • 2 large onions 
  • ½ cup of vegetable or chicken broth ( i use my homemade chicken broth)
  • A few threads of saffron
  • 1 Tbsp. of ginger
  • 1 Tbsp. of paprika
  • Four Mexican cheese blend, shredded 
  • Pre-made gluten-free tostones 
  • Olive oil spray
  • Optional toppings: salsa, guacamole, and sour cream

Preparing the chicken:

First, remove all the fat and skin from the chicken. To tenderize, I place the chicken in a shallow bowl, pour some vinegar over it, and leave it for a few minutes. Then I rinse and drain the chicken, patting it dry before rubbing on the salt. 

Using a mortar, crush half the garlic, parsley, cilantro, and some salt until it is soft and tender. Do this again with the second half, making sure the flavors incorporate nicely, and the garlic isn’t spilling out of the small mortar bowl (the reason for doing it in batches). Transfer the garlic and herb mix into a medium bowl. 

Next, add the lemon juice and the remaining spices (except ginger and paprika) and stir. 

Add the chicken to the bowl, making sure to coat it in the marinade. 

Cover the bowl and put it in the fridge for 30 to 45 minutes. 

While the chicken is chilling, prepare the vegetables. 

Dice the onions, peppers, and mushrooms. Over medium heat, add half of the olive oil. Add the onions, sauté for 5 to 10 minutes, depending on your preference. I like mine tender, so I sauté for the full 10 minutes. If you prefer crunchy, only do 5. 

Add the peppers and mushrooms to the pan and sauté.

Set the vegetable mix to the side. Take the chicken out of the fridge. Add the other half of the olive oil to the pan and then the chicken. Cook the chicken until it is cooked all the way through. Remove the chicken from the heat and let it cool slightly until you can safely slice or dice it without getting burned.

Once the chicken is ready, return it to the pan with the vegetable mix. Add the broth and cook on medium to low heat for another 5 minutes, allowing the flavors to blend. 

This is where I add paprika and ginger. It provides a nice pop of flavor to the dish. 

Preparing the tostones: 

For the tostones, to keep it healthier, I don’t fry mine. Instead, I soak the plantains in salt and water for a few minutes and dry them with a paper towel. Then, I transfer them to a pan lined with a parchment sheet and spray both sides with olive oil.

Bake them in a 375 degree F preheated oven until lightly browned.

If you have an air fryer I would love to hear if you’ve ever tried to fry your plantains that way. 

Time to assemble!  

Transfer the cooked tostones to plates and heap on the chicken and vegetable mix. The amount you want to put on the plantains is entirely up to you. 

Sprinkle the cheese over the top, pop it back in the oven to melt (remember, oven-safe plates!). 

You can serve this dish as is or add salsa, guacamole, and/or sour cream. It is entirely up to you! 

At my house, we return to this delicious dish at least once a week. It’s comfort food that I thought I had lost, but am excited to say I enjoy it even more now than before I discovered my gluten allergy. 

What meal do you typically eat with tostones?

While this copycat Bahama Breeze chicken tostones recipe is one of my favorites, I’d love to hear how you eat tostones. 

Do you make your tostones from scratch, or do you have a favorite gluten-free brand you turn to? 

Best gluten free and keto cabbage pizza

This delicious cabbage pizza crust recipe is keto, gluten-free, and easy to make 

If you’ve been living the keto and gluten-free lifestyle for any amount of time, chances are high you know how to make cauliflower pizza crust. But have you tried a cabbage pizza crust? 

Cabbage and cauliflower are very similar when it comes to nutrient contents, fat, calories, and carbs. They have roughly the same amount of Vitamin C, A, and E and are great sources of fiber and antioxidants. To see a more complete comparison, visit Cauliflower vs. Cabbage

When it comes to using them in a no-dough pizza recipe, the differences lie in taste, texture, and ease of preparing. 

Cauliflower has a mild sweet and nutty flavor with bitter undertones. If overcooked it can become very bitter. To make a cauliflower crust pizza requires that the cauliflower be pureed in a food processor in preparation to make the crust. 

Cabbage can sometimes be sweet and has a very tough and crunchy texture, making it perfect for pizza! To prepare a cabbage pizza crust, the cabbage only needs to be sliced or chopped. No food processor necessary (which means a little less mess to clean up). 

Between the taste, the crunchy texture, and the easy assembly I haven’t quite figured out why the cabbage pizza crust isn’t as well known as the cauliflower crust. 

It’s time for that to change!

How to make a cabbage pizza crust & what to put on it

There are tons of gluten-free and keto pizza options now available in most large cities. Pizza places have jumped on the trend and offer gluten-free crust options. It’s even simple now to purchase no-carb frozen pizza dough at Walmart. But I have yet to see them tackle this simple and delicious cabbage crust. 

To start, you will need the following ingredients: 

  • 4 cups of either sliced or chopped cabbage
  • 1 small onion, diced
  • 1 Tbsp. olive oil
  • 1 Tbsp. butter
  • Salt and pepper to taste
  • 3 eggs, room temperature and slightly beaten

Once you’ve gathered all the ingredients, pre-heat a large pan on your stovetop to medium heat. Add the olive oil and the butter. Once the butter has melted, add the diced onion and sauté for five minutes. Next, add the cabbage and season with salt and pepper. 

Continue to cook until both the onions and the cabbage are tender. Remove from heat and place the mixture in a bowl to cool slightly. 

While the cabbage is cooling, I gather the toppings.

My favorite toppings for this pizza recipe

While I love the taste of homemade tomato sauce, the truth is if I’m crunched for time, this is the first place I cut back. I’ve included my steps for a simple tomato sauce that I absolutely love, but the pizza will turn out great with store-bought pizza sauce as well. 

My favorite toppings for this cabbage pizza recipe is chicken, sautéed with fresh garlic, red peppers, mushrooms, and spices. 

Here is what you will need for the chicken toppings: 

  • 1 chicken breast, diced into pieces
  • 4 garlic gloves, minced
  • 1 large red pepper, diced
  • 2 cups of mushrooms, sliced
  • 1 Tbsp. of butter 
  • 1 Tbsp. of olive oil
  • ¼  tsp of cumin
  • ½ tsp of coriander
  • ½ tsp of paprika
  • Salt & Pepper to taste

Reheat over medium heat, the same pan that you used to prepare the cabbage. Add butter, olive oil, and garlic. Sauté the garlic until it is tender and golden brown. Next, add the diced chicken and cook for 5 minutes. Add the cumin, coriander, paprika, salt, and pepper as the chicken lightly browns. Next, you will add the peppers and mushrooms and continue to cook until they reach your preferred tenderness. Set aside.

I am all about making as little mess as possible. That’s a big part of why I make the toppings before the tomato sauce. It’s the cooking I find enjoyable, not the clean up. 

Here’s what you need to gather to make the pizza sauce: 

  • 1 jar of pizza sauce, or pesto sauce (which I used in mine)
  • 1 Tbsp. of olive oil
  • 1 large tomato, diced
  • 2 garlic cloves, minced
  • 1 Tbsp. of cilantro
  • ⅛ tsp of cumin
  • ¼ tsp of paprika
  • Salt & Pepper to taste

Using the same pan, heat the olive oil over medium-heat and sauté the garlic until golden brown and tender. Next add the tomato and spices. Cook until the sauce is thick and no water is left in the pan. 

Time to assemble!  

Preheat the oven to 350 degrees F. 

Cover the pizza pan with parchment paper and spray it with olive oil to prevent the cabbage from sticking to the pan. 

Pour the slightly beaten eggs over the cabbage and onion and mix well to form the gluten-free, keto-friendly crust. Make sure it is well mixed as the eggs are what bind the vegetables together. 

Top the crust with a light coating of the tomato sauce, to much liquid will prevent the crust from holding its shape and the pizza will be soggy. 

Next add the sautéed chicken, red peppers, and mushrooms. Top with 1 cup of shredded mozzarella cheese. 

Place the pizza pan on the center rack of the preheated oven for 25 to 30 minutes. 

Once done I like to sprinkle mine with some parsley before serving. It adds a pop of color and enhances the flavor. 

Serve hot and enjoy! 

Your shopping list for making this no-dough pizza recipe 

Here is everything you will need to gather before you begin: 

  • Pizza pan
  • Parchment paper
  • Sauté pan
  • 3 Tbsp. olive oil
  • 2 Tbsp. butter 
  • 4 garlic cloves
  • 3 cups cabbage
  • 1 small onion
  • 1 large tomato
  • 1 small red pepper
  • ½ cup of mushrooms
  • 3 eggs
  • 1 cup mozzarella cheese
  • 1 chicken breast
  • ⅜  tsp of cumin
  • ½ tsp of coriander
  • ¾ tsp of paprika
  • 1 Tbsp of cilantro
  • Salt & Pepper


What topping can you put on pizza?

I’ve added a few of my own special twists to this delicious keto, gluten-free pizza recipe. In the past, I’ve skipped the chicken for an easy meat-free vegetarian pizza. 

For those who like their pizza a little heavier, substitute the chicken for a ground sausage or beef. 

One of the best things about making pizza at home is all the little tweaks you can make specific to your tastes. 

What is your favorite pizza topping? 

A well-served Sunday pot roast platter

The Meat Lover’s Sunday Pot Roast

There’s nothing like a pot roast for a classic Sunday family dinner. It’s delicious and chock-full of nutrients.

Pot roasts speak of warmness and wholesomeness. Plus, you can make a hearty pot roast without spending too much on expensive beef cuts. What’s more, the leftovers can be used to make sandwiches, pita wraps, or stir-fry.

In this detailed blog, we’ve talked about all-things pot roast. So let’s dig in, shall we?

Digging Deeper: What is Pot Roast?

Before we move on to our pot roast recipe, let’s brush up on our knowledge about this classic beef dish for meat lovers. Sunday pot roasts are cooked at low temperatures, preferably in pressure cookers to achieve that juicy, tender, melt-in-the-mouth meaty texture.

Sunday pot roast ingredients on a white table

The slow-cooking technique helps the beef absorb the flavorful gravy. Serve it with some homemade garlic bread, mashed potatoes, or pita.

Here’s the recipe for a delicious Sunday pot roast:

Ingredients

  • 1 whole Chuck Roast (About 1 Kg or 3 Pounds)
  • 2 tbsp. Olive Oil
  • 2 big, white Onions
  • 6 to 8 crunchy carrots OR 1 dozen baby carrots
  • 4 to 5 diced Potatoes
  • Salt and Pepper to taste
  • 1 cup Beef Broth or Red Wine
  • 3 cups Beef Stock
  • Fresh Thyme and Rosemary to taste

Directions

  1. Choose well-marbled meat to achieve a good-looking pot roast. Marinate it with a generous amount of salt and pepper. Set aside.
  2. Preheat the oven to 275˚. Turn on your stove on medium flame and put a large Dutch oven or a pot over it.
  3. Add olive oil or butter. 
  4. Add diced onions, carrots, and potatoes into the pot. Fry the veggies until they’re golden brown.
  5. You can add more olive oil if required.
  6. Carefully lift the marinated chuck roast and place it into the pot.
  7. Sear for a few minutes and plate it. 
  8. In the same pot, add beef broth to get the most of that grill-y flavor from seared meat and veggies.
  9. Let the broth bubble and then proceed to place the chuck roast back into the pot. Pour in the beef stock or red wine and add the fried veggies. Sprinkle thyme and rosemary sprigs and cover it with the lid.
  10. Roast it for about 3 hours in the oven. Adjust the duration if you’ve chosen a bigger beef marble.

Looking for more recipes online? Check out Cali Yum today! I’m Ahlam, a cooking and baking lover. I share nutritious and delicious healthy food recipes. You can also find gluten-free Moroccan or Mediterranean recipes on my recipe blog.

For more details, contact me today!

Incredibly Delicious Moroccan Carrot “Zaalouk” Salad

In Morocco, we serve Zaalouk salad as a side dish with fish, chicken, or just toast as
an afternoon healthy snack. This yummy carrot salad can be prepared in less than 30
minutes.

Zaalouk…

Is a Moroccan salad, very popular throughout Al Maghreb, which is always prepared
with eggplant and similar base ingredients. In Arabic, Zaalouk means “purée” or
something soft.

Make your own Moroccan salad with my Zaalouk salad recipe!

Carrot is a favorite for both foodies and dieters alike. It’s a versatile root vegetable, a good source of vitamins, minerals and fiber, and pairs well with many foods (not to mention our fingers ?).

Let’s talk about some amazing carrot facts:

  • Carrot used to be purple before the 17th Century.
  • In the 16th Century Dutch growers cultivated modern day orange carrot by taking mutant strains of the purple, yellow and white carrots and develop them into the sweet, plum, orange variety we have today.
  • Carrot is crunchy, tasty and highly nutritious.
  • Carrot is a weight loss friendly food.
  • A good source of beta-carotene, fiber, vitamin k1, vitamin A, biotin, potassium, vitamin B6, lutein and antioxidants.

Pectin…..

Is the main form of soluble fiber in carrots; soluble fibers can lower blood sugar by slowing down the digestion of sugar and starch, and feed the friendly bacteria in the gut.

Cellulose…..

Is the main form of insoluble fiber in carrots, but also hemicellulose and lignin; insoluble fibers reduces the risk of constipation and promotes regular and healthy bowel movement.

Lutein…..

One of the most common antioxidant in carrots, predominantly found in yellow and orange carrots and is important for eye health.

Immune function….

Vitamin C is another antioxidant that carrots provide, which help our body fight disease and keep it healthy. If you want to know what are antioxidants, and how do they work? Learn here.

My mom has either to make carrot juice or salads, she never missed it from our lunch salads selection. She tried her best to persuade me to eat it often, because it will help me see in the dark. And yes for real, I grow up loving carrots…

I made this carrot salad very quickly in my instant pot 10-in-1, I purchased it last year during Black Friday sale, and I really love it…..I can easily make lunch or dinner in no time.

Cutting carrots for salad

Delicious Carrot Salad

  • 1 lb. carrot
  • 4 cloves garlic
  • 5 tablespoon olive oil
  • 3 tablespoon lemon juice
  • 1 tablespoon cilantro
  • 1 tablespoon parsley
  • 1 tablespoon salt
  • 1/2 tablespoon paprika
  • 1/2 tablespoon cumin
  • 1/8 teaspoon cayenne pepper
  • 1/4 cup water
  1. Peel off carrot skin and cut it either oblique or roll cut.
  2. Add olive oil to the instant pot or pressure cooker, carrot, garlic and all spices.
  3. Set instant pot at pressure cooker, custom 10 mins.
  4. Once time is up, open safely the pot and mash carrots with the masher or fork.
  5. Since carrot is composed of water, there will be some water remaining inside the pot just set the pot to sauté.
  6. Once water is all evaporated then add cilantro, parsley and lemon.
  7. Allow the salad to cool down or serve hot as preferred.

Please enjoy!

By Ahlam 


This error message is only visible to WordPress admins

Error: No feed found.

Please go to the Instagram Feed settings page to create a feed.